Get Started with SD-WAN
Welcome to the SD-WAN Portal! Here, you can seamlessly manage your SD-WAN services and optimize your enterprise network. Whether you're deploying new sites, monitoring performance, or configuring policies, our intuitive interface provides all the tools you need.
Table of Contents
Log In
Ready to explore the SD? Follow these steps to log in:
- Navigate to the SD-WAN Portal.
- Enter your Email and Password.
- Click Sign In.
If you don’t have your credentials, please contact WiLine for support.
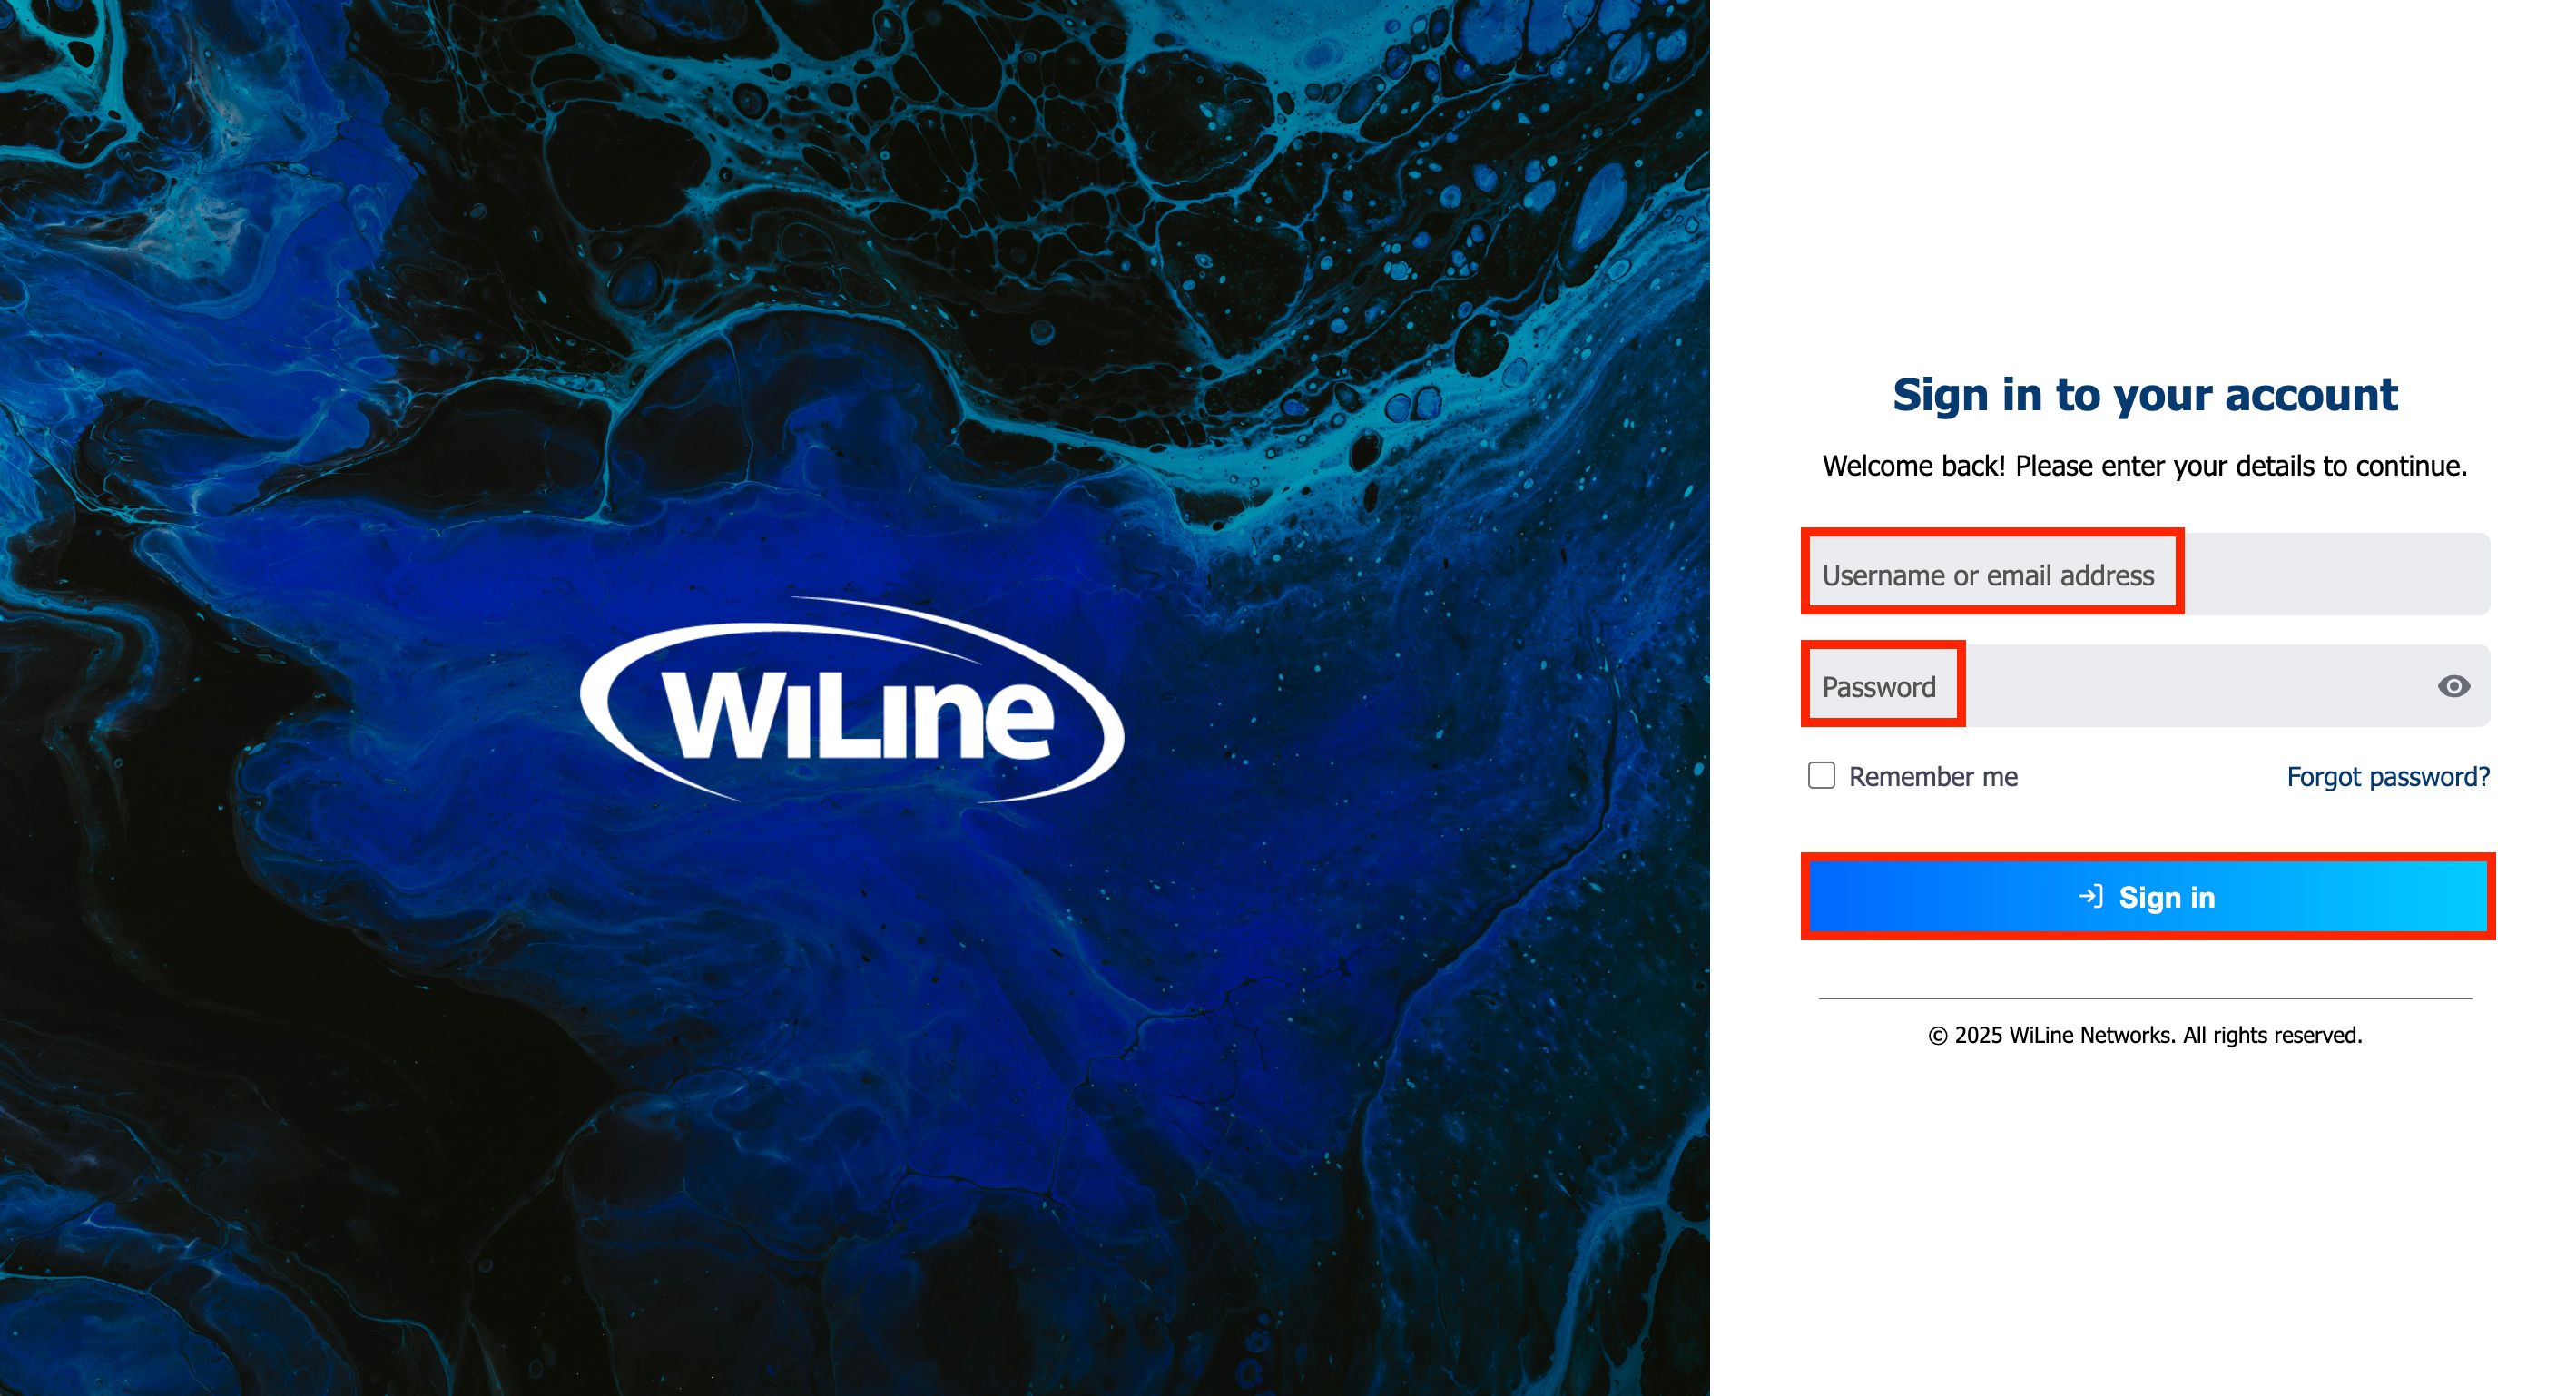
Figure 1. Signing into SD-WAN.
Once signed in, you’ll be ready to monitor and manage your network!
Forgot Password
If you have forgotten your password, follow these steps to recover it:
-
On the login page, click the Forgot Password link.
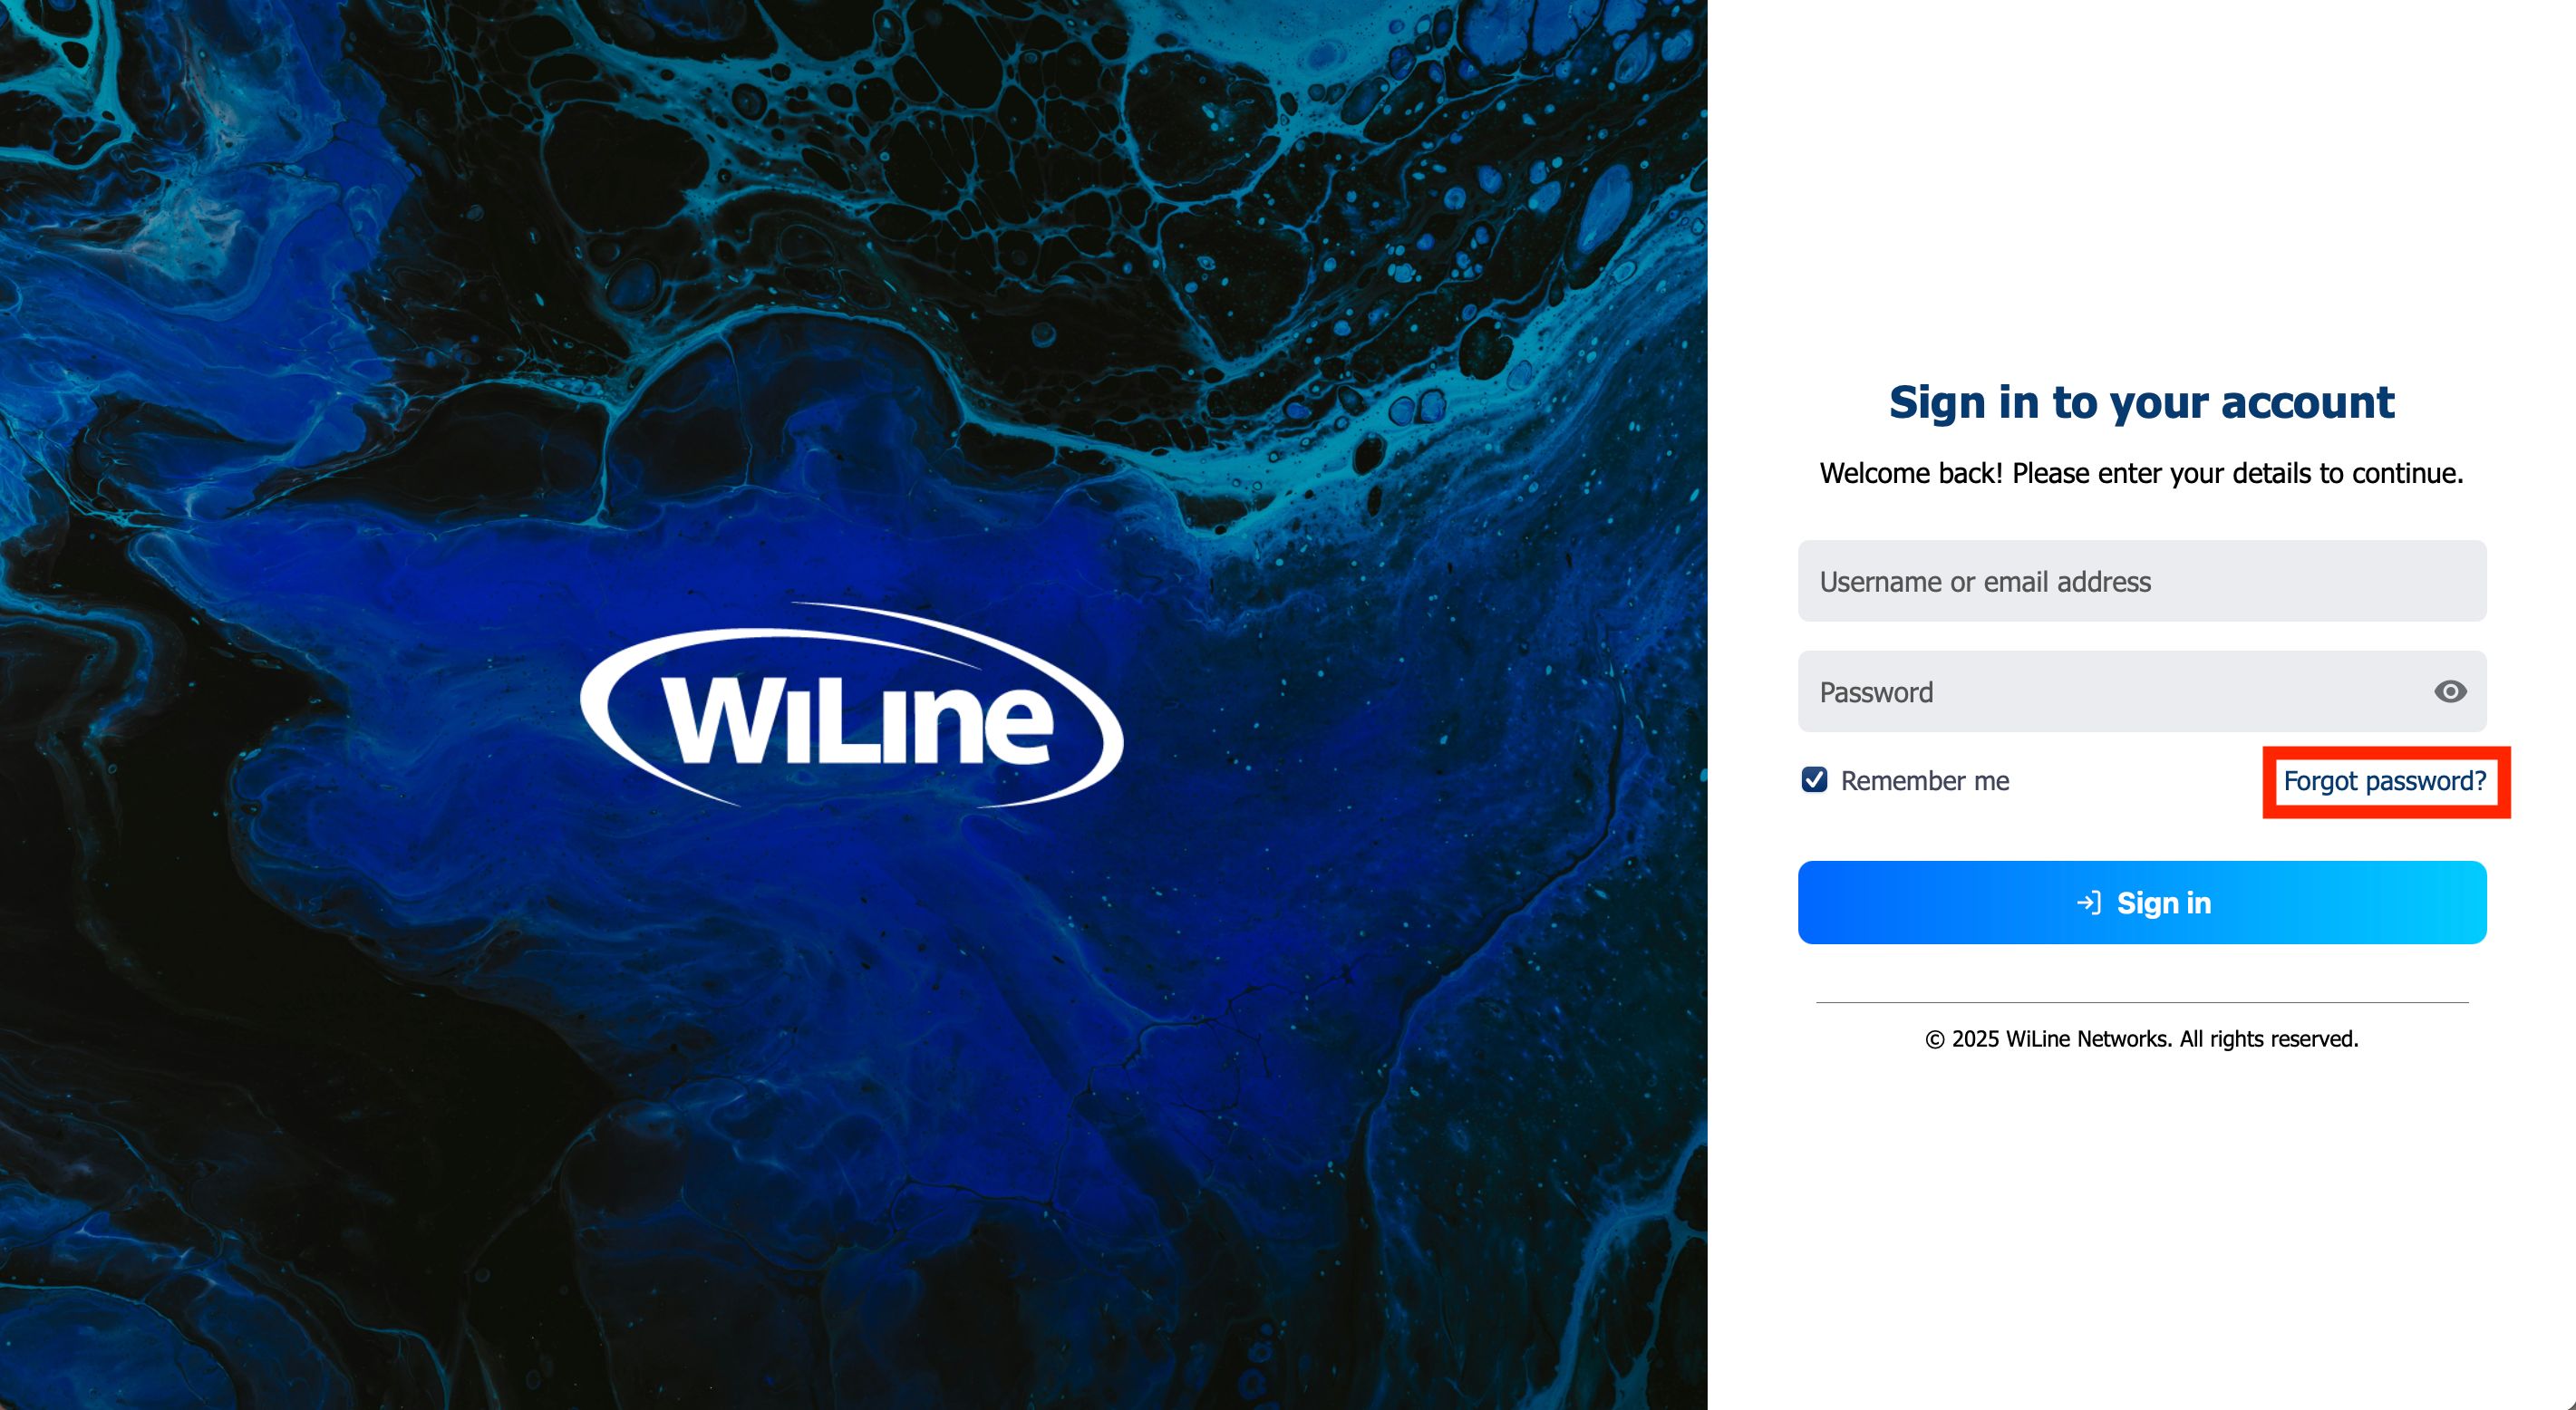 Figure 2. Click ‘Forgot Password’ on the login page.
 -
Enter your username or email address associated with your account and click Submit.
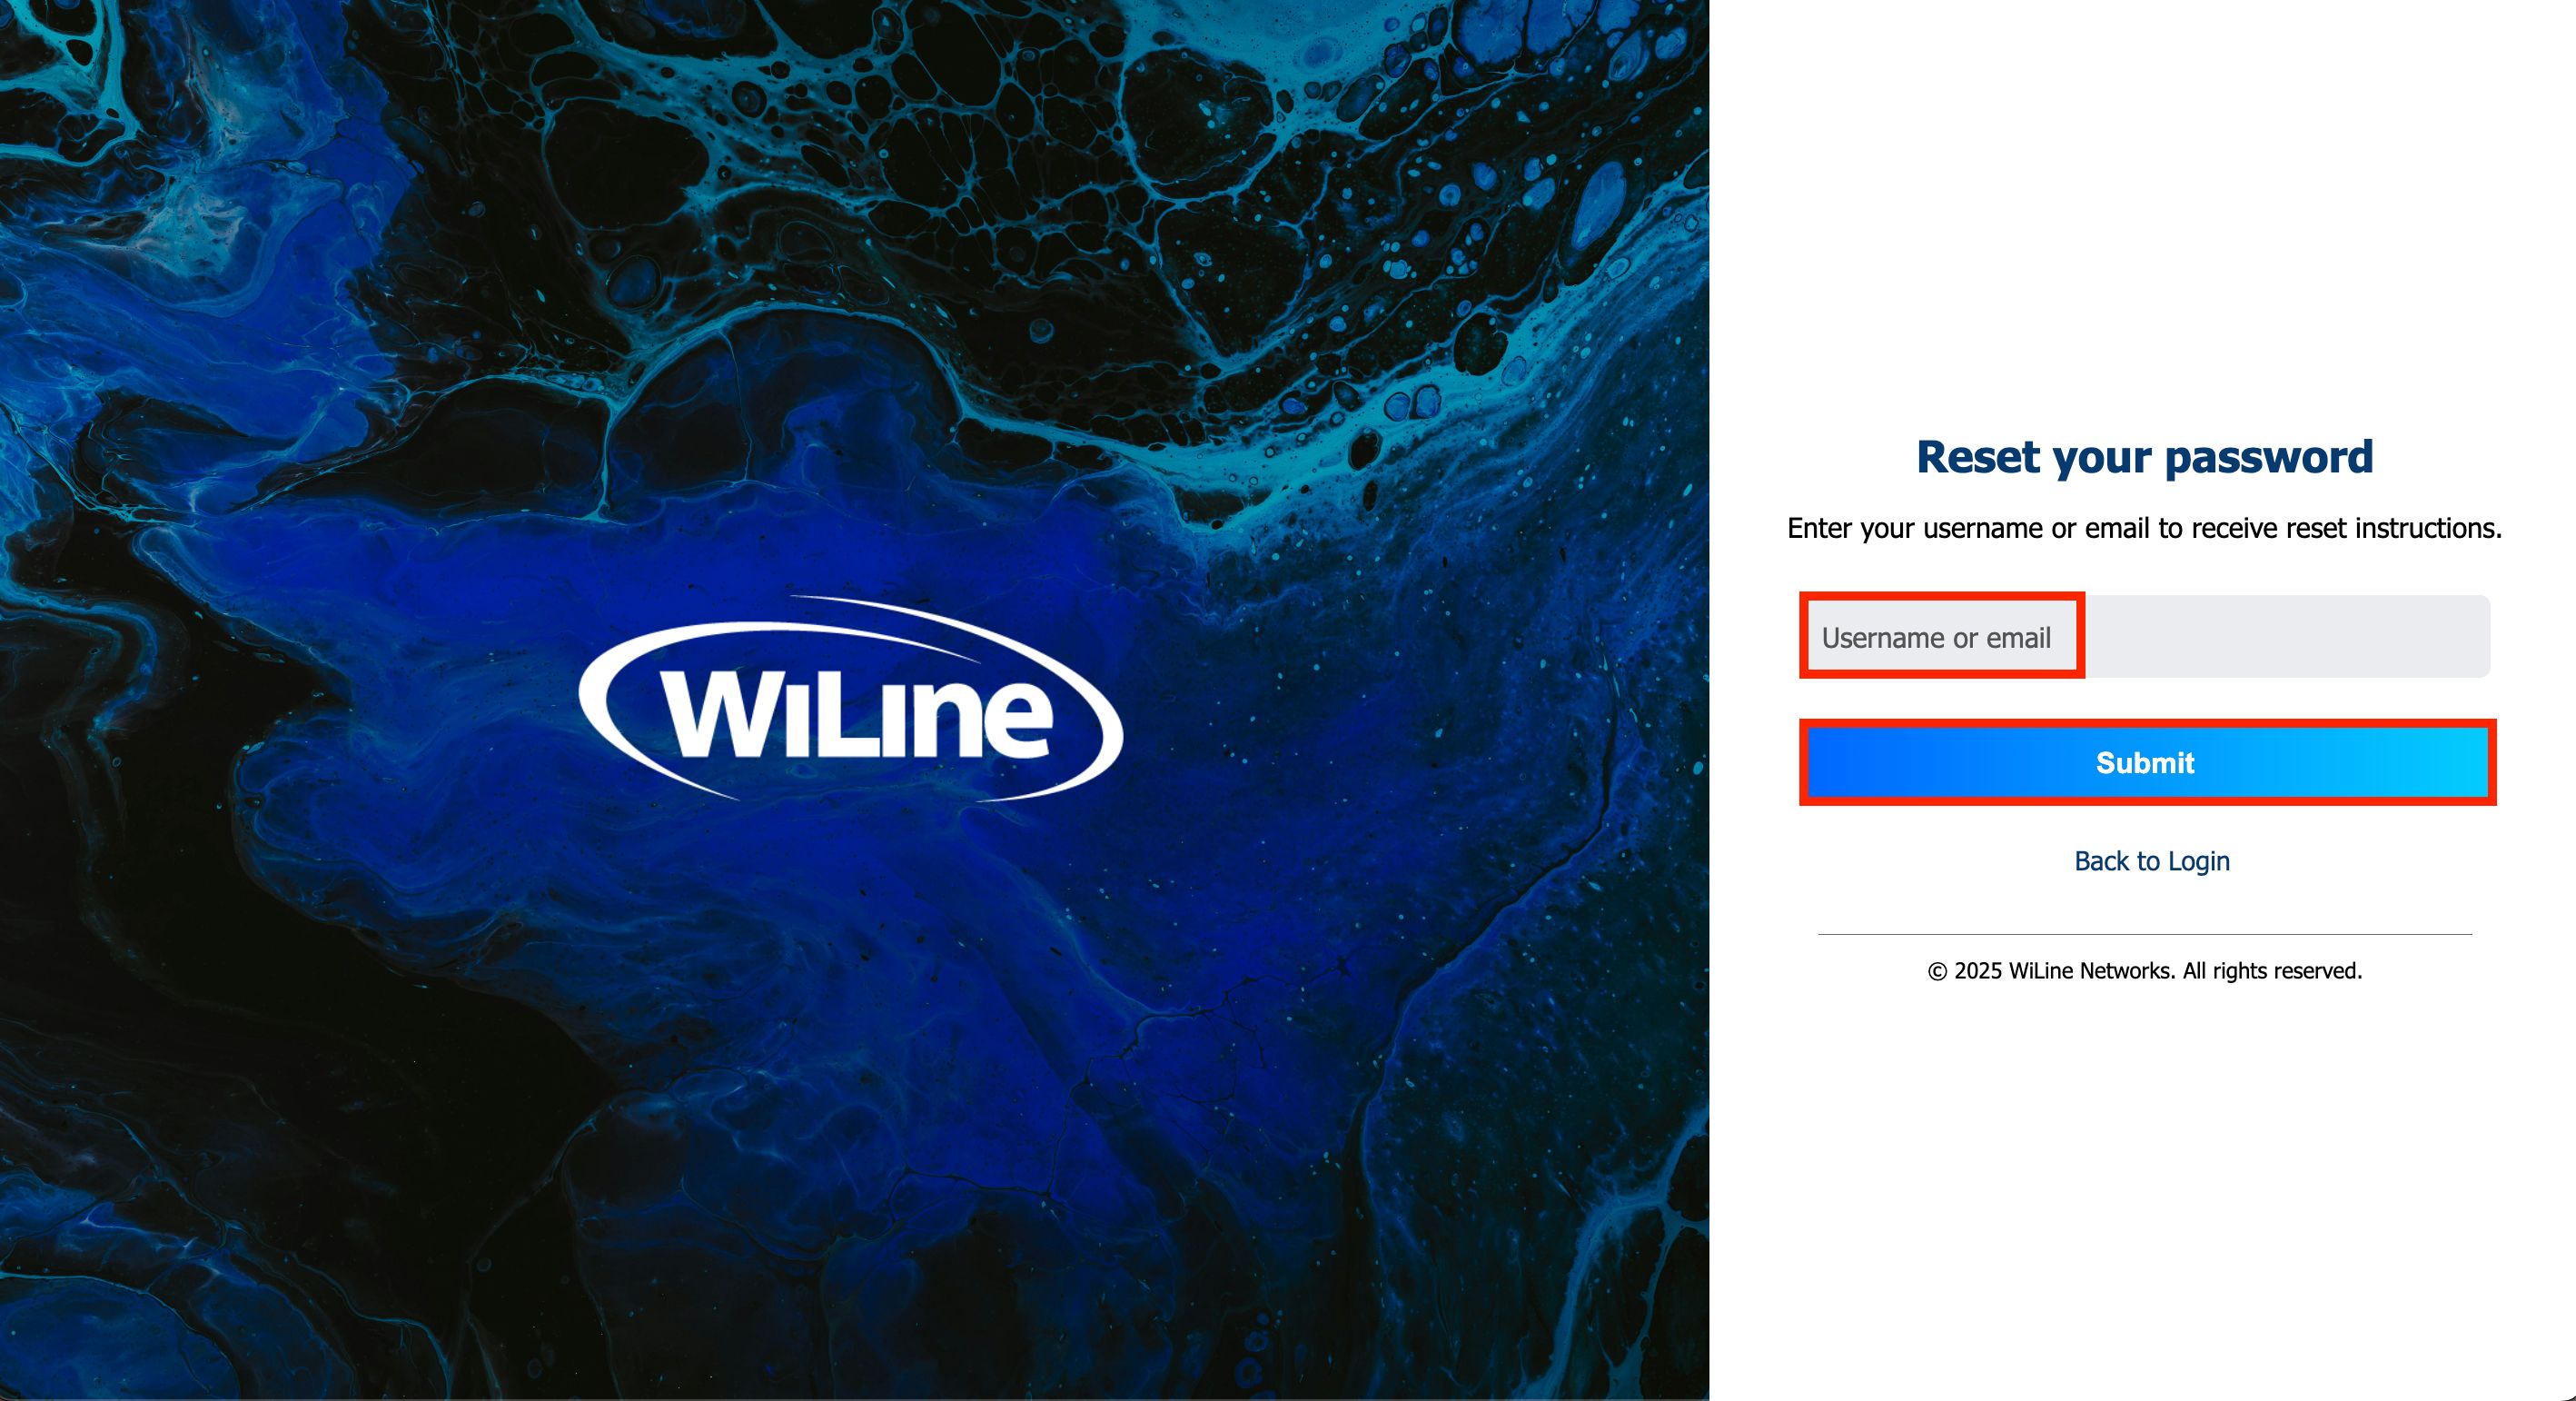 Figure 3. Enter your username or email to recover access.
 -
You'll be redirected to the login page and a confirmation message will appear:
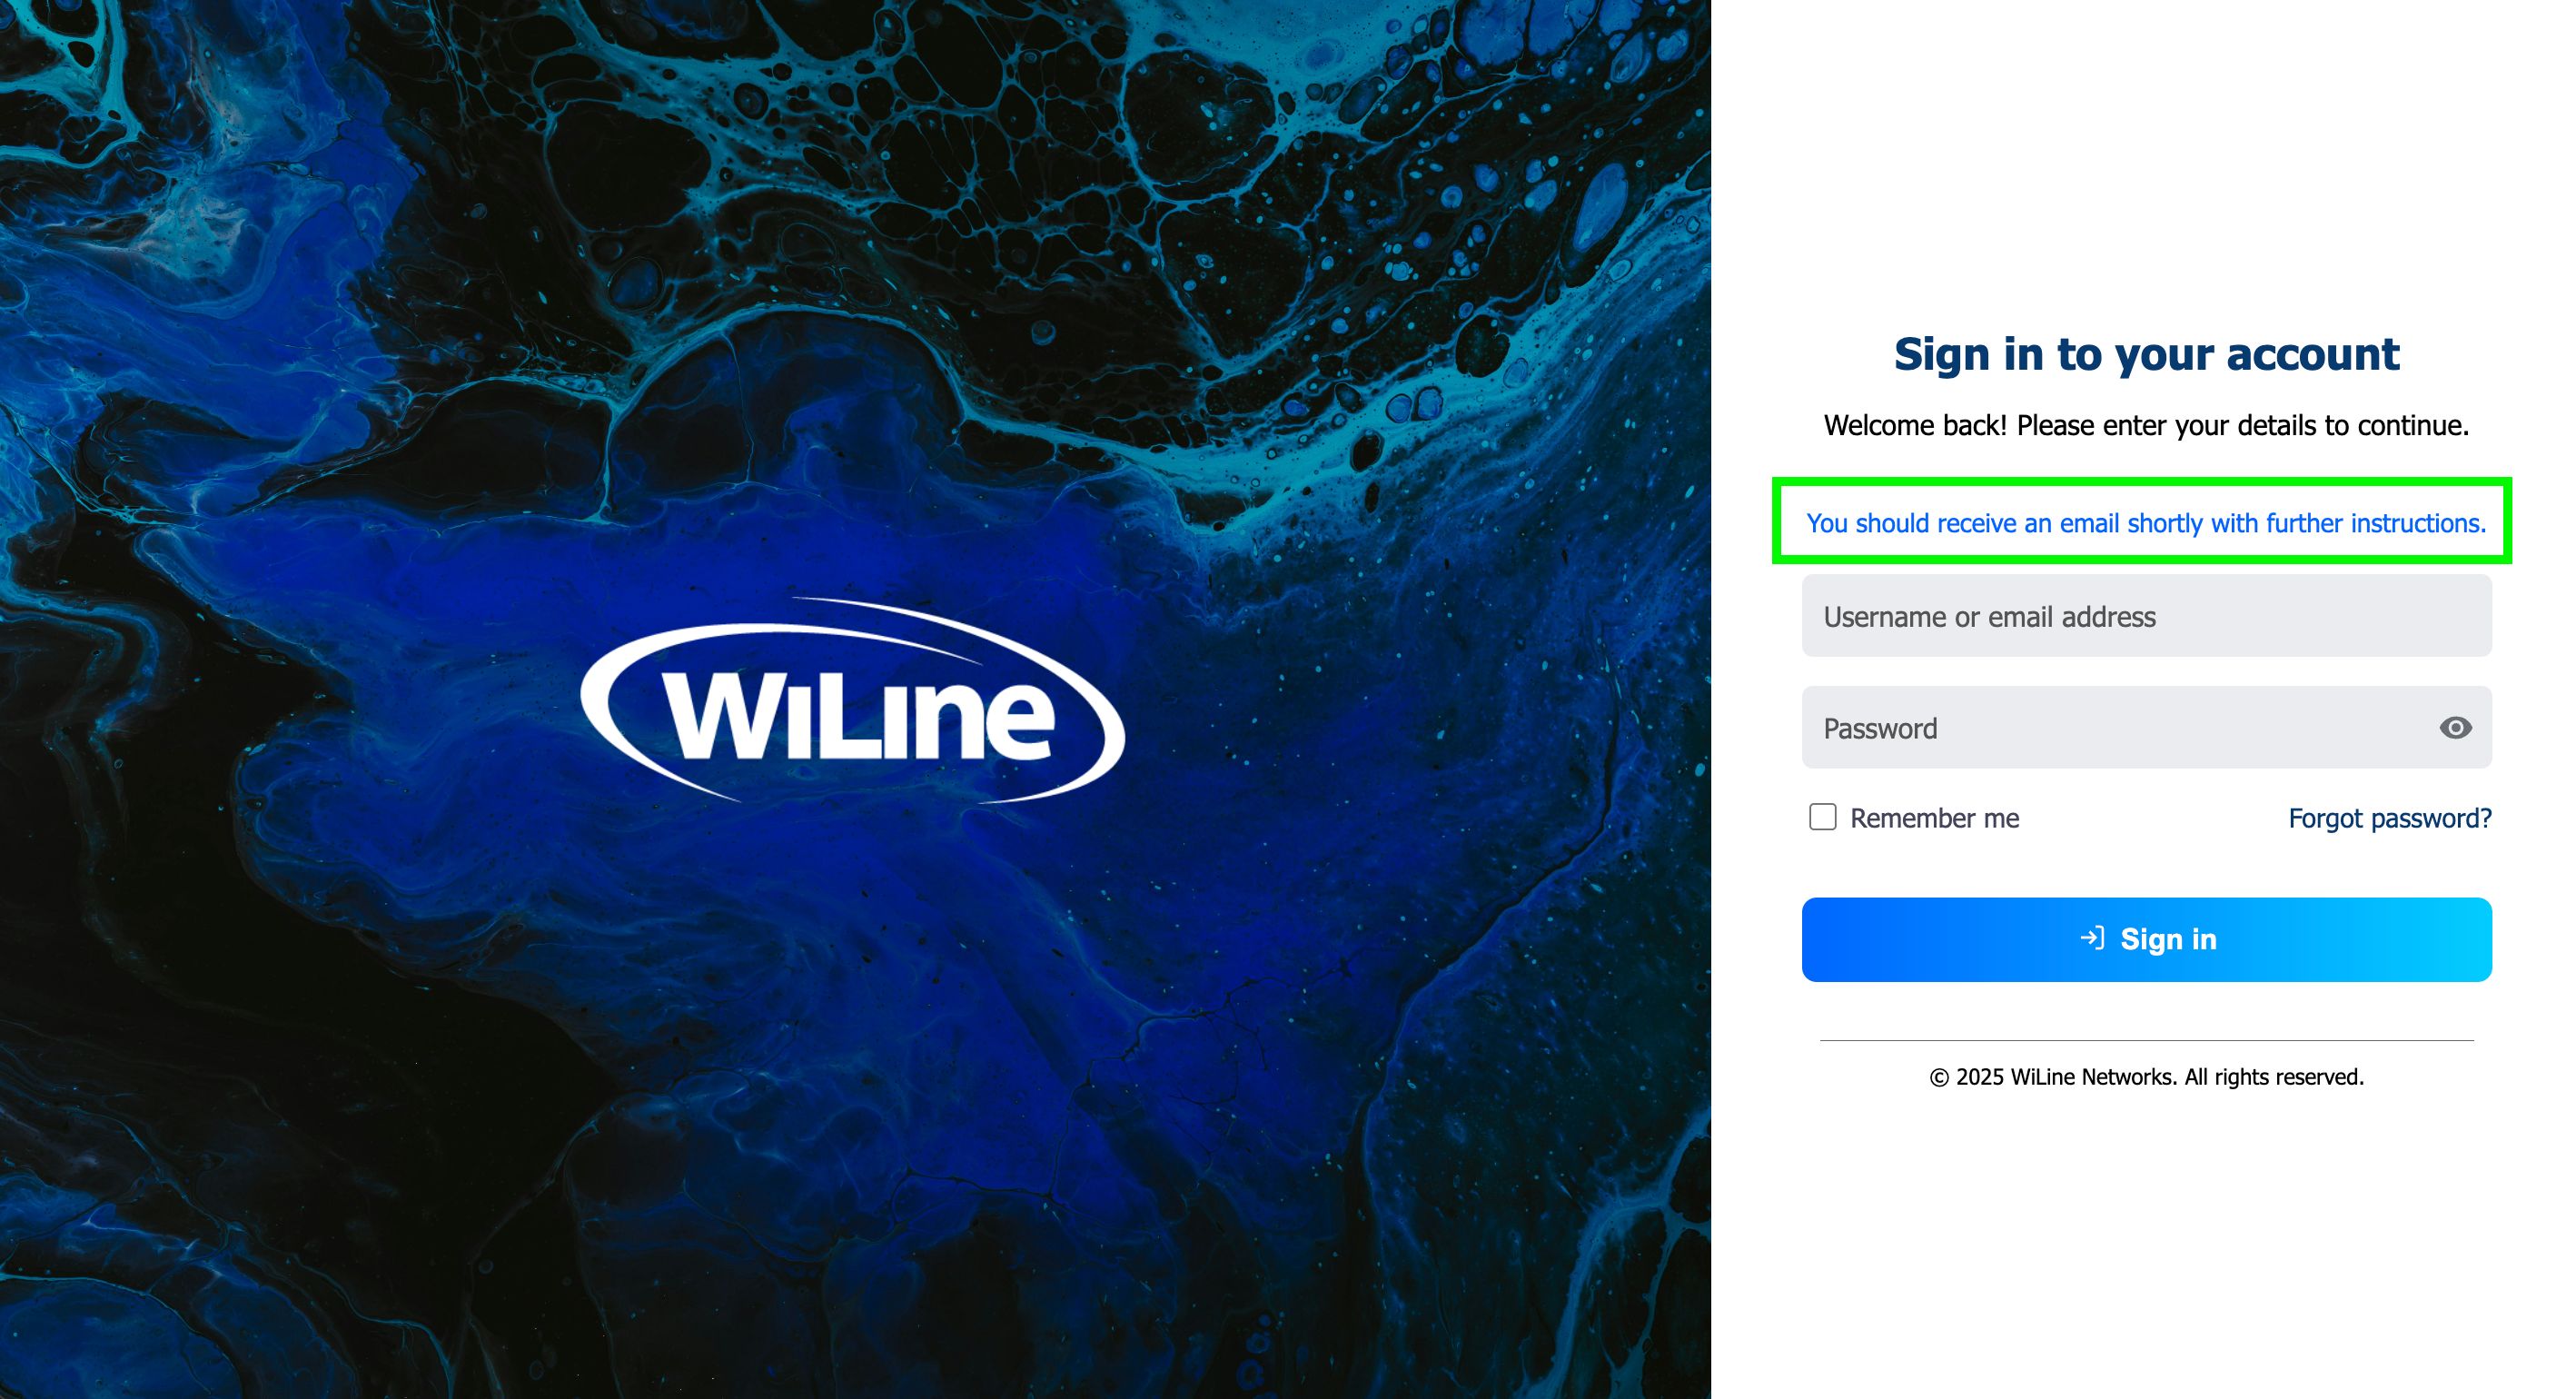 Figure 3. Password recovery confirmation message.
 -
Check your email inbox for a password reset email from WiLine.
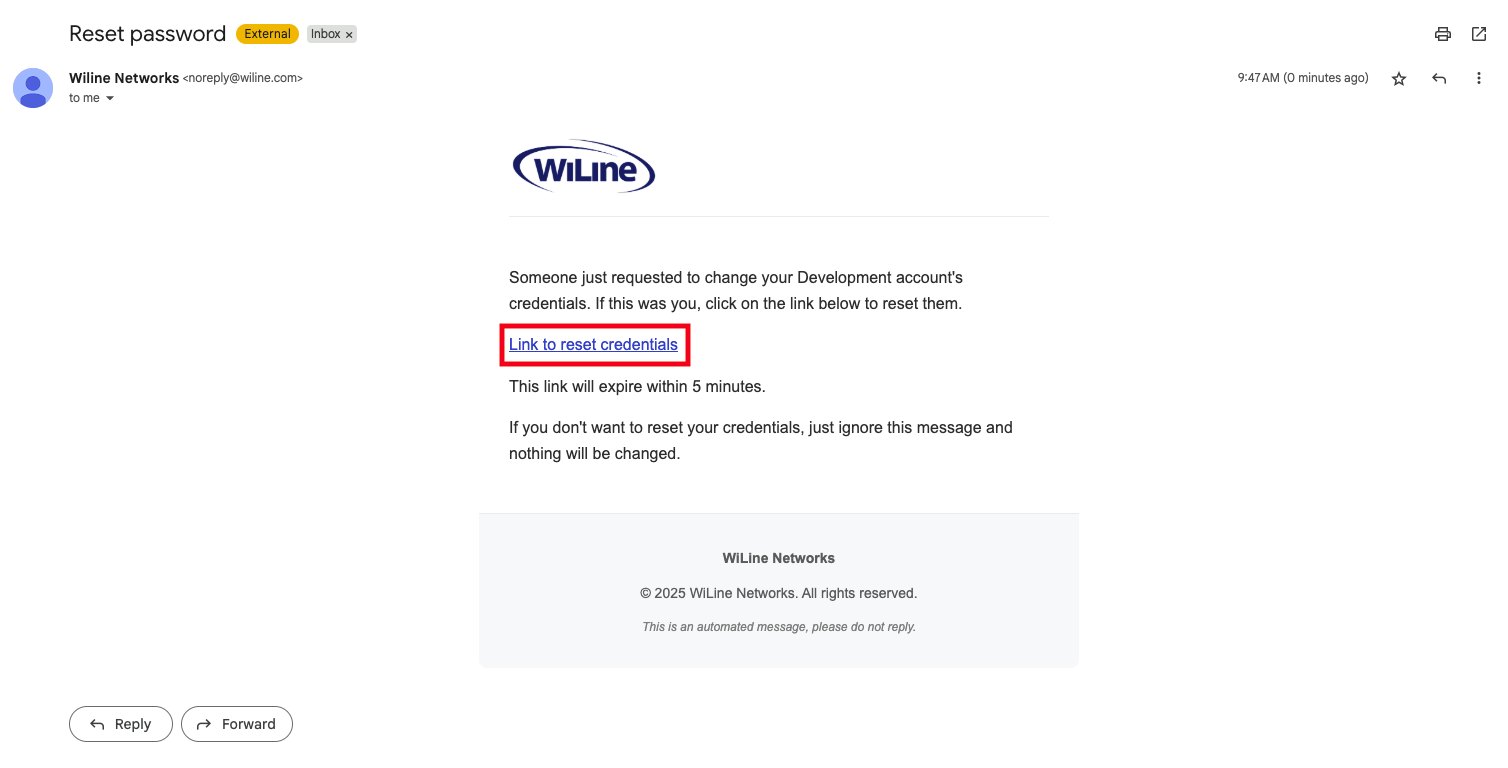 Figure 4. Check your email inbox for the password reset message.
 -
Click the password reset link provided in the email.
-
Enter your new password and confirm it by typing it again.
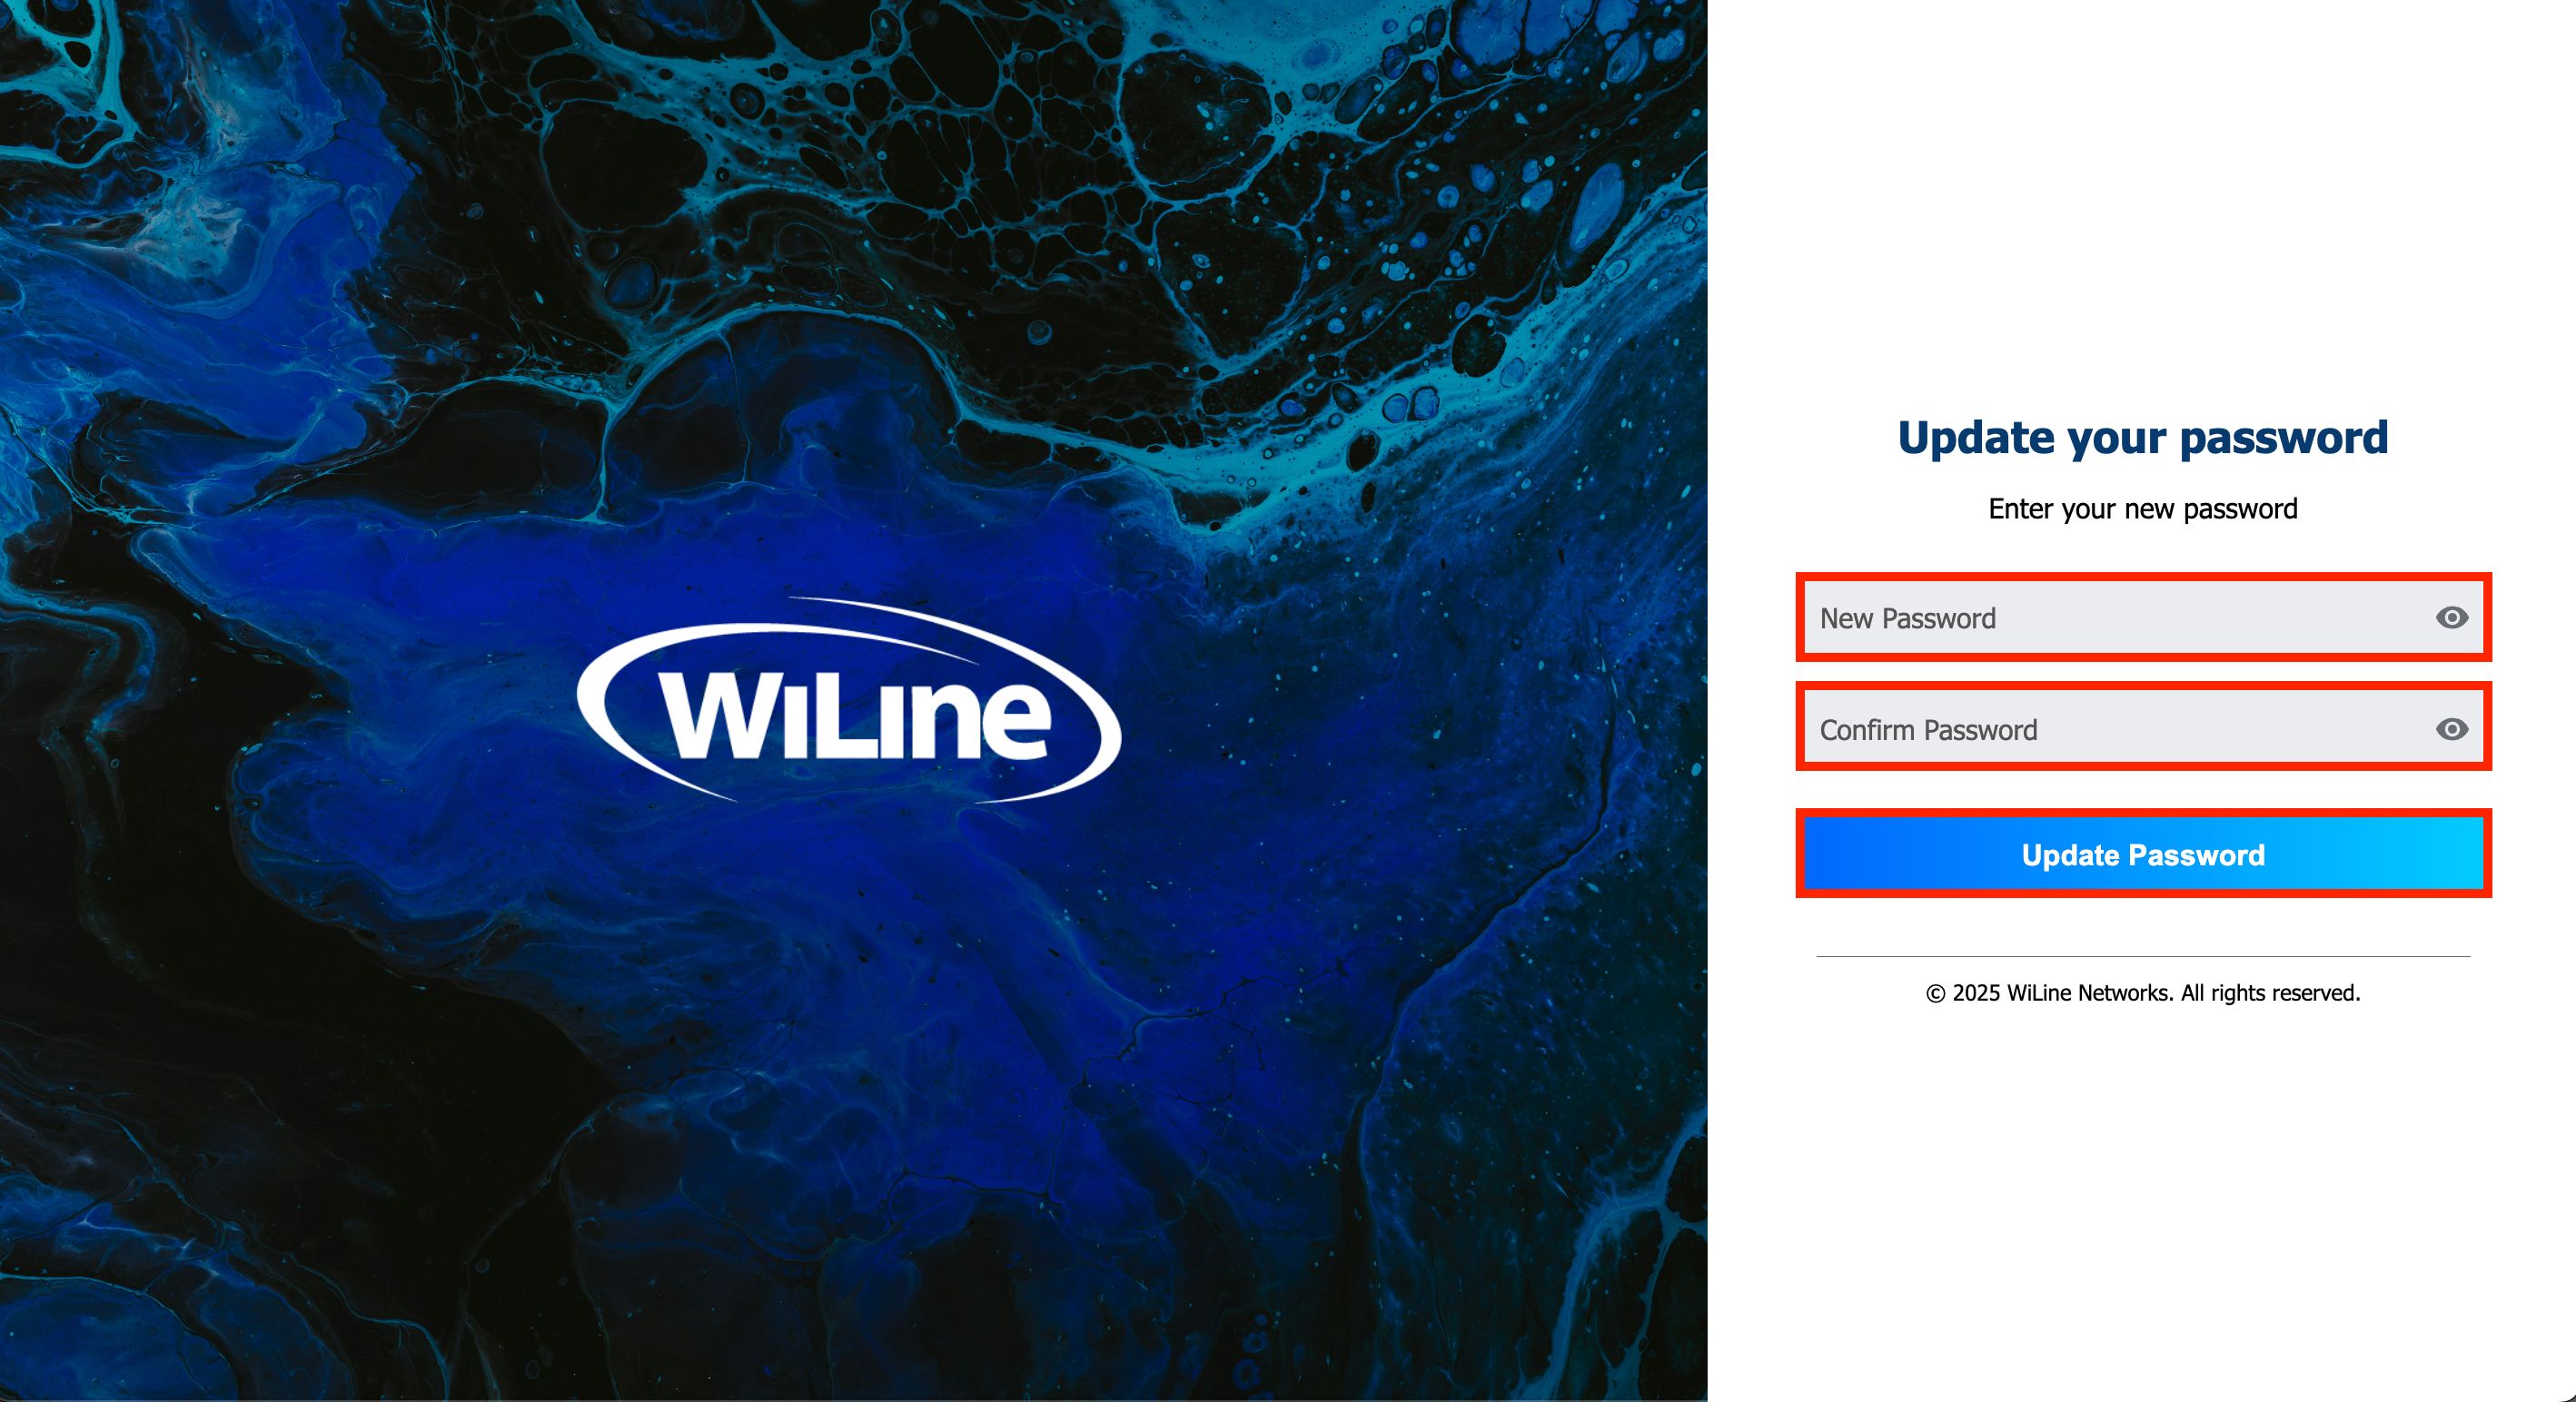 Figure 5. Enter and confirm your new password to update it.
 -
Click Update Password to finalize the reset.
You can now use your new password to log in to the SD-WAN Portal.
Navigate the SD-WAN Portal
The SD-WAN Portal interface is organized into three main areas that enable efficient navigation and management:
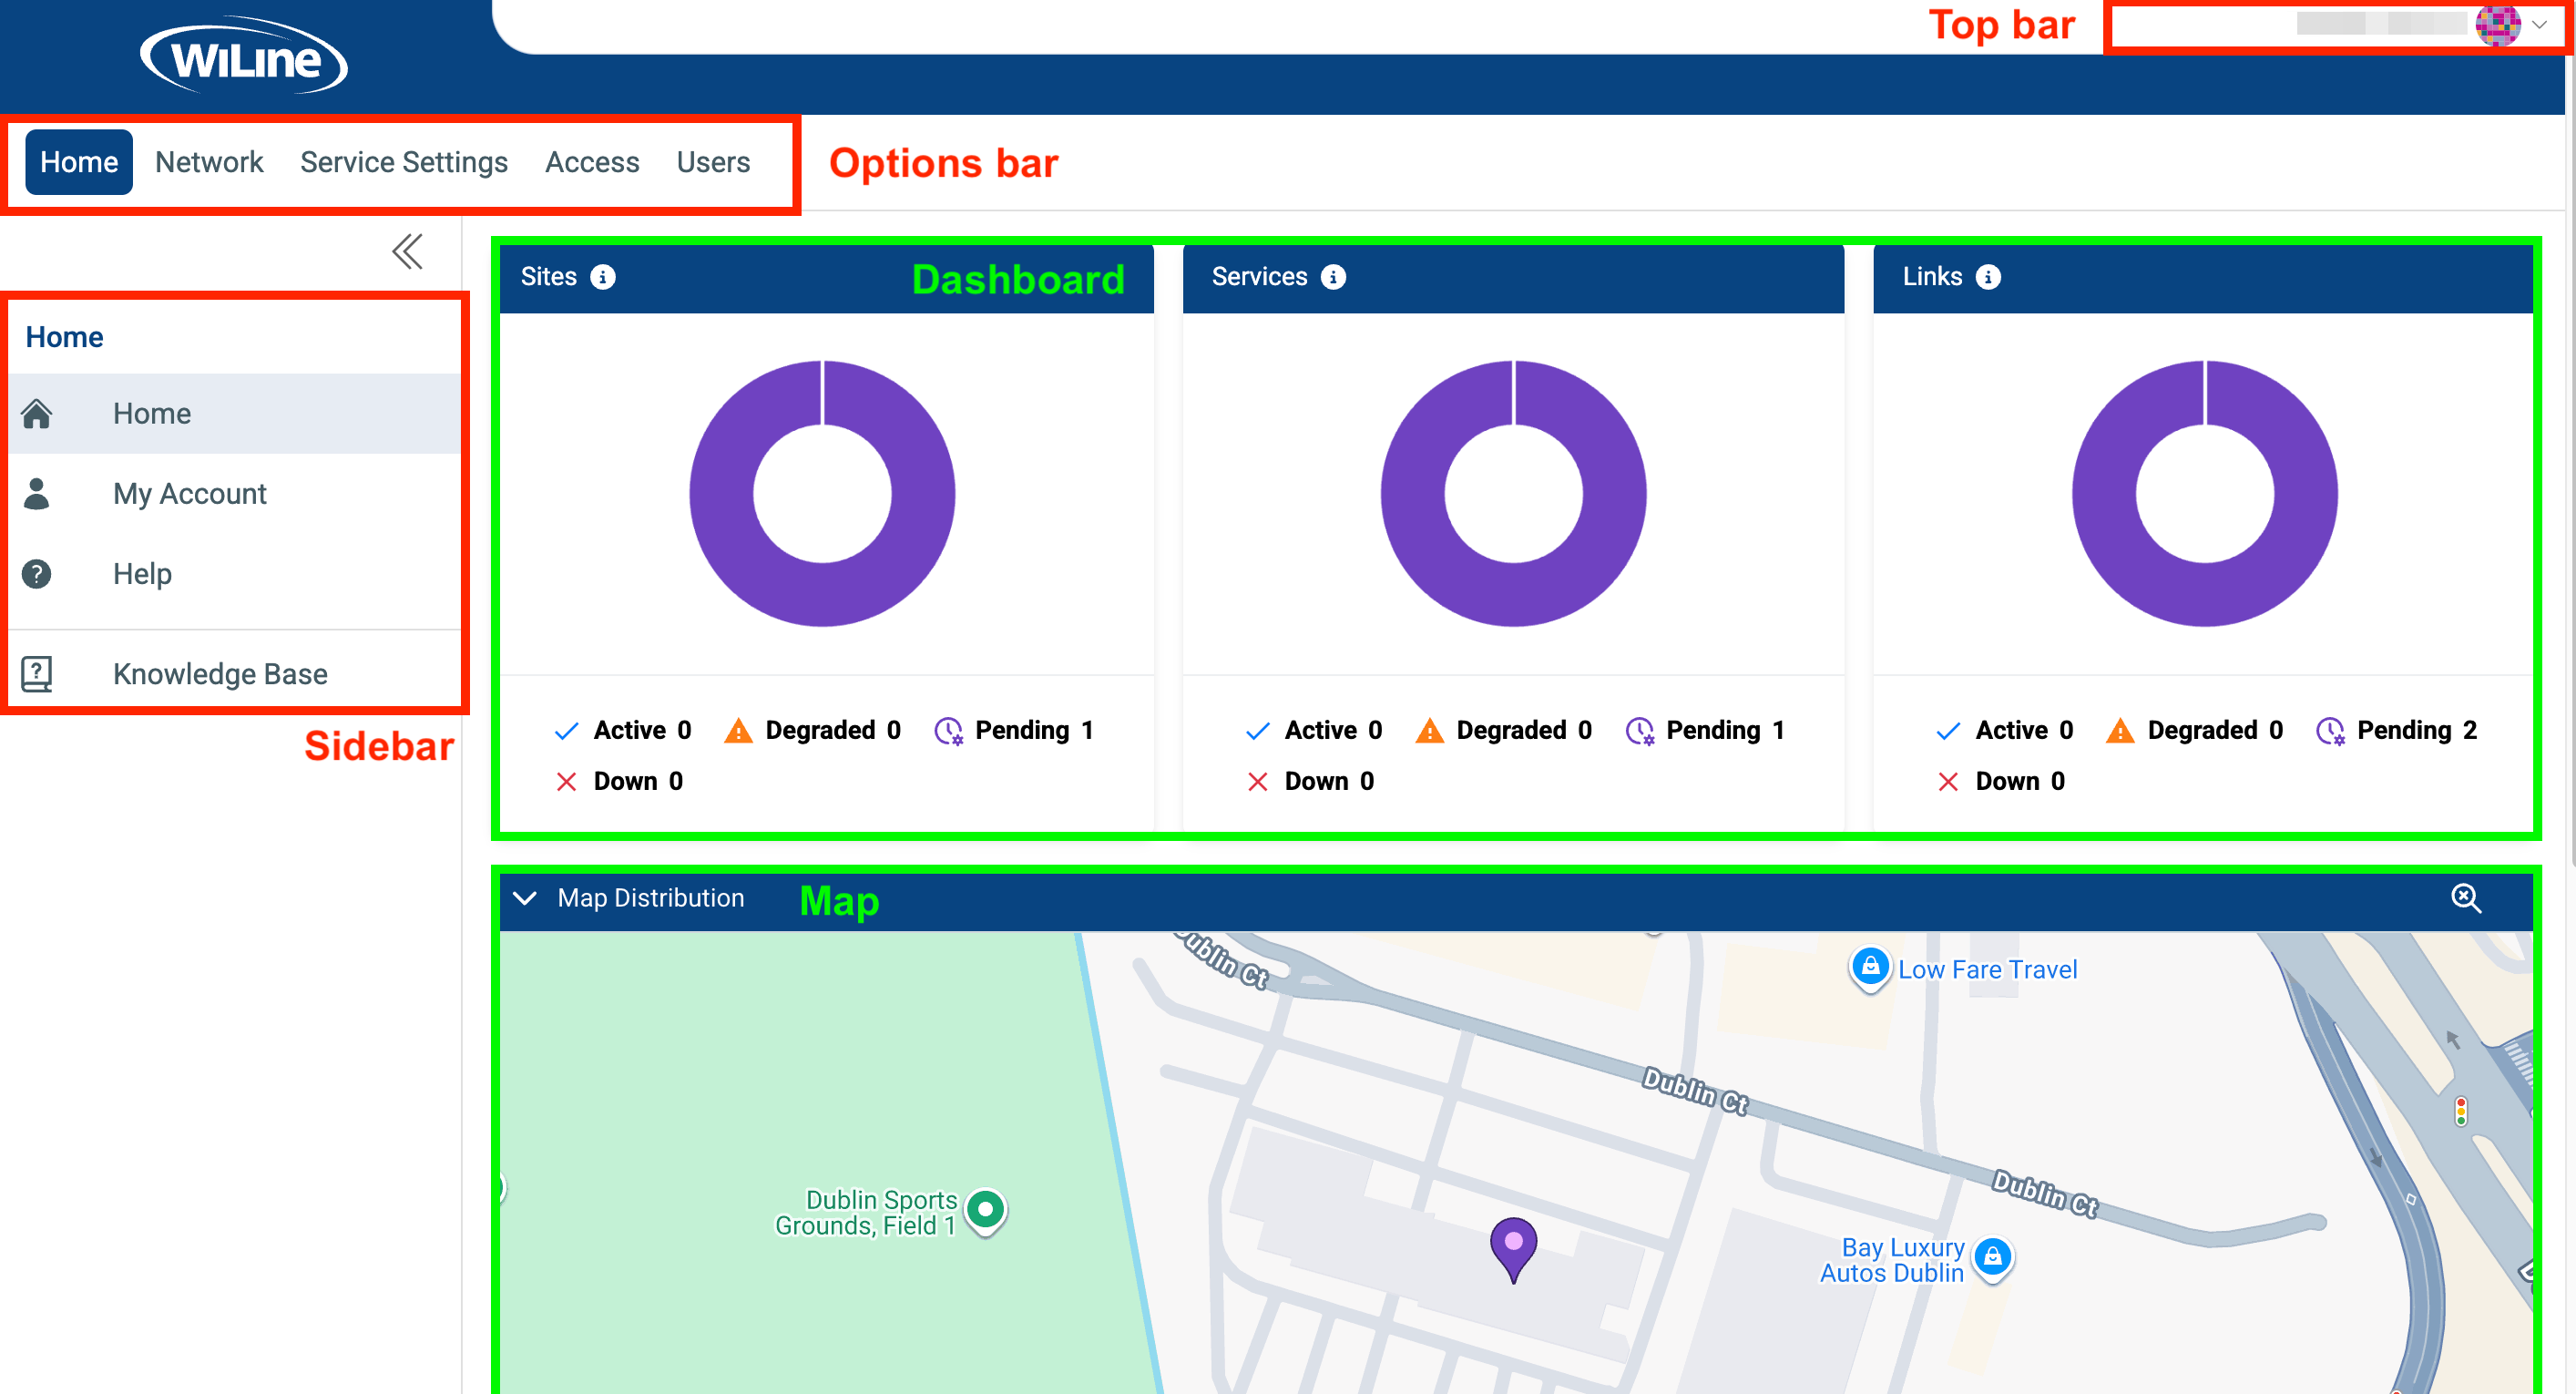
Figure 9. Exploring the SD Portal's home page.
- Top Bar — Located at the upper-right corner, it provides quick access to account actions such as My Account, Help, and Sign Out.
- Options Bar — The primary horizontal menu across the top, allowing you to switch between major sections like Home, Network, Service Settings, Access, and Users.
- Sidebar — A contextual navigation panel for the active Options Bar section, containing detailed links and controls such as overview pages, reports, and configuration panels. It can be collapsed using the toggle icon.
These areas work together to provide global actions (Top Bar), section-level navigation (Options Bar), and detailed task navigation (Sidebar), enabling fast access to dashboards, site management, alerts, and user controls.
Once logged in, you'll be directed to the Home Dashboard. For detailed instructions on using the dashboard, please refer to the Home documentation section.
Options Bar and Sidebar
The Options Bar at the top lets you access the portal's main sections, each opening related options in the Sidebar:
-
Home: Manage your account and find support.
- 📄️ Home: Return to the main dashboard.
- 📄️ My Account: View and manage account details.
- 📄️ Help: Access support resources and documentation.
-
Network: Full visibility and control over your network.
- 📄️ Overview: Real-time summary of network status and key metrics.
- 📄️ Network Usage: Monitor bandwidth consumption.
- 📄️ Traffic Insights: Analyze traffic flow and performance.
- 📄️ SD-WAN Appliance: Monitor appliance performance.
- 📄️ Service Quality: Track Quality of Experience (QoE) metrics.
- 📄️ Link Statistics: Manage statistics for active network links.
- 📄️ Traffic Destinations: Configure and optimize destination routes.
-
Service Settings: Customize platform behavior.
- 📄️ Alerts & Notifications: Set alerts and manage notifications.
-
Access: Manage user groups, members, and permissions to ensure organized and secure access.
- 📄️ Manage Groups: Organize user groups.
- 📄️ Manage Members: Assign and manage users in groups.
- 📄️ Manage Permissions: Define access permissions per group.
-
Users: Manage customer users efficiently.
- 📄️ Manage Portal Users: Add, edit, search, and delete users.
Sidebar Controls
The Sidebar includes two key controls:
- Top Toggle: Use the icon to collapse or expand the menu for a streamlined view.
- Bottom Knowledge Base: Provides quick access to this documentation website for additional resources.
Top Bar
Located at the upper-right corner, the Top Bar offers quick access to essential account actions:
-
My Account: Manage your personal profile and security.
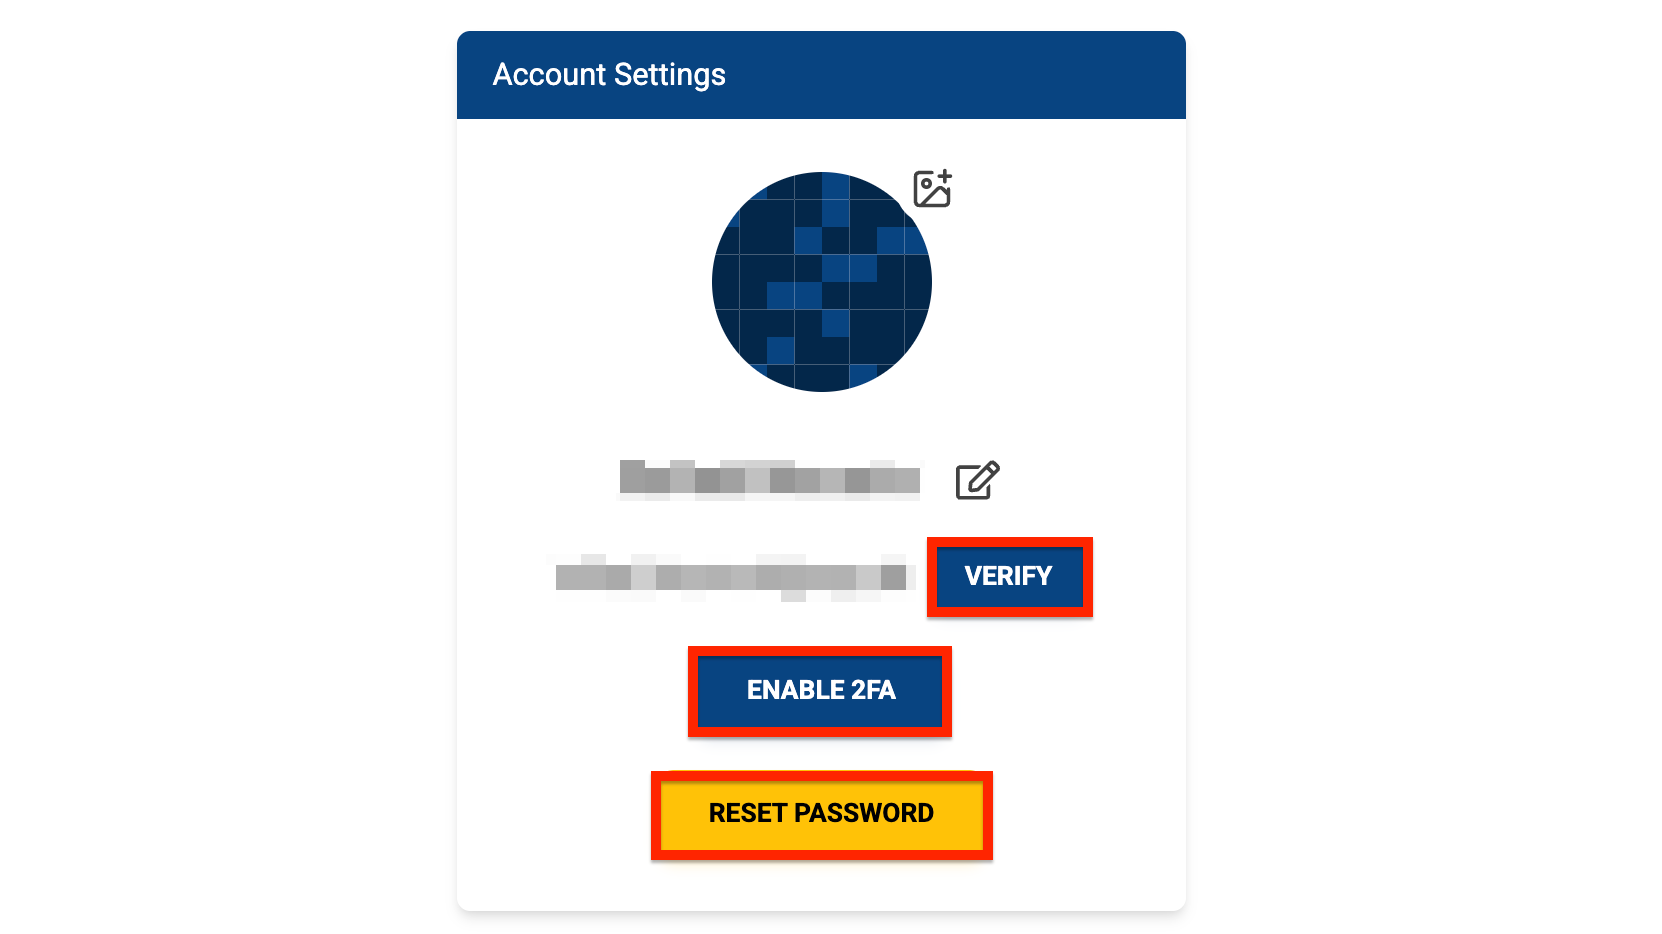
Figure 6. Account Settings Options.-
Edit Name: Update your first and last name, then click Save to apply changes.
-
Verify Email: If unverified, click VERIFY to receive a verification email.
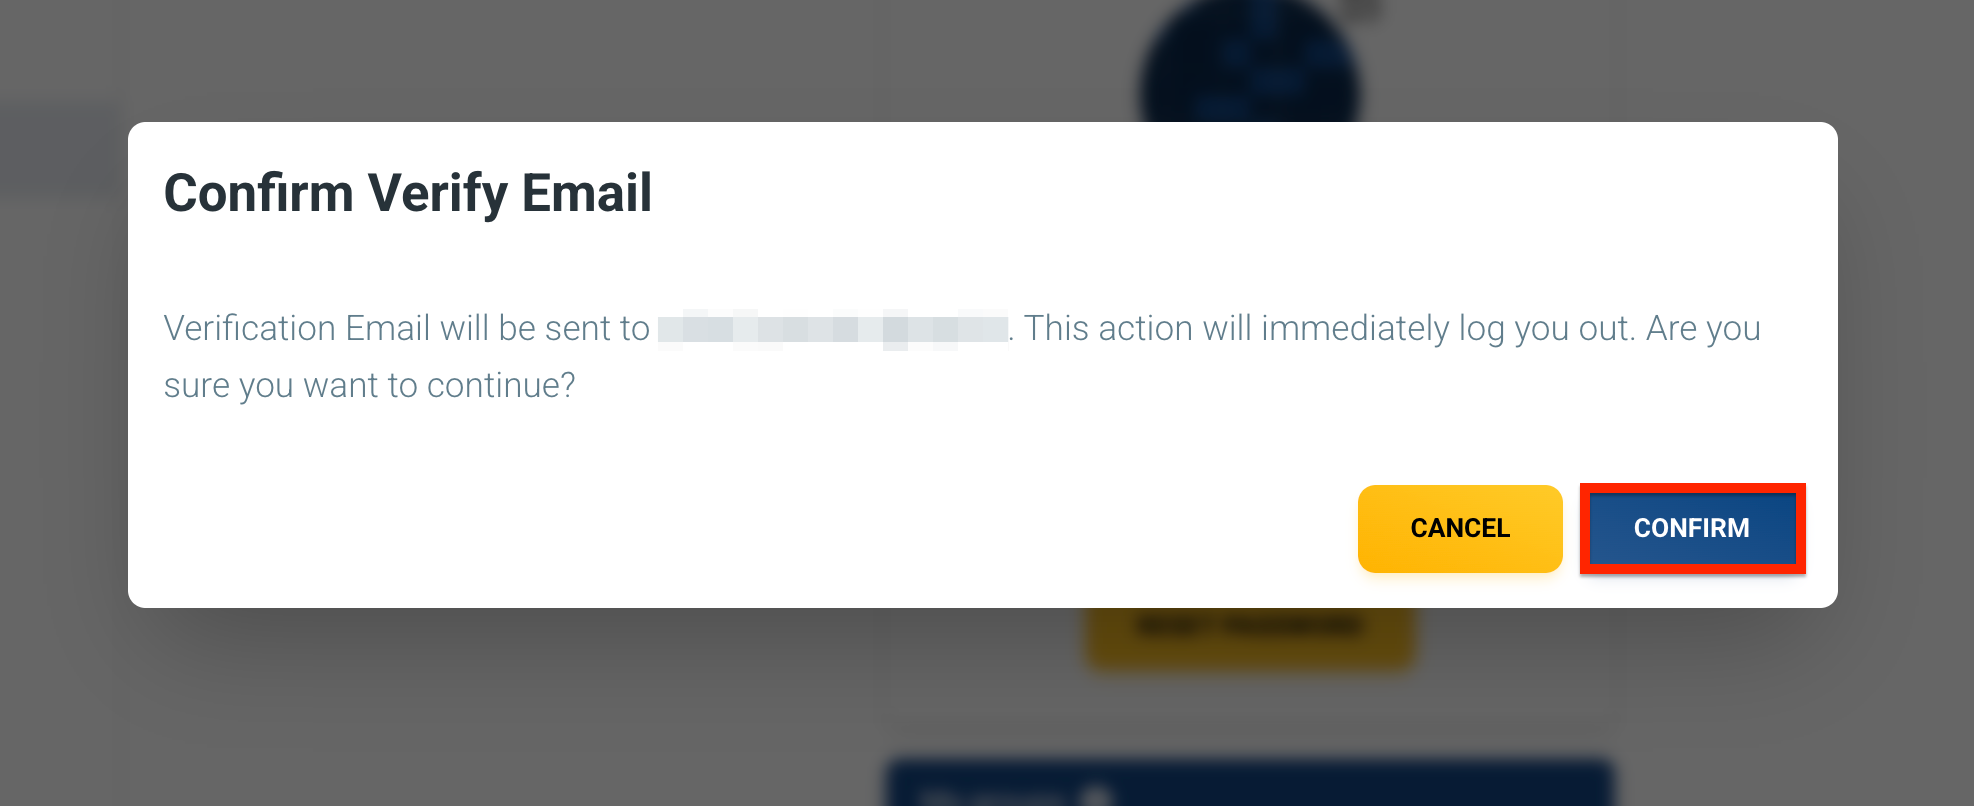
Figure 7. Verify Email Popup. -
Enable Two-Factor Authentication (2FA): Adds an extra layer of security to your account. When 2FA is enabled, you’ll verify your identity using an authentication app in addition to your password.
-
Click ENABLE 2FA.
A confirmation pop-up will appear.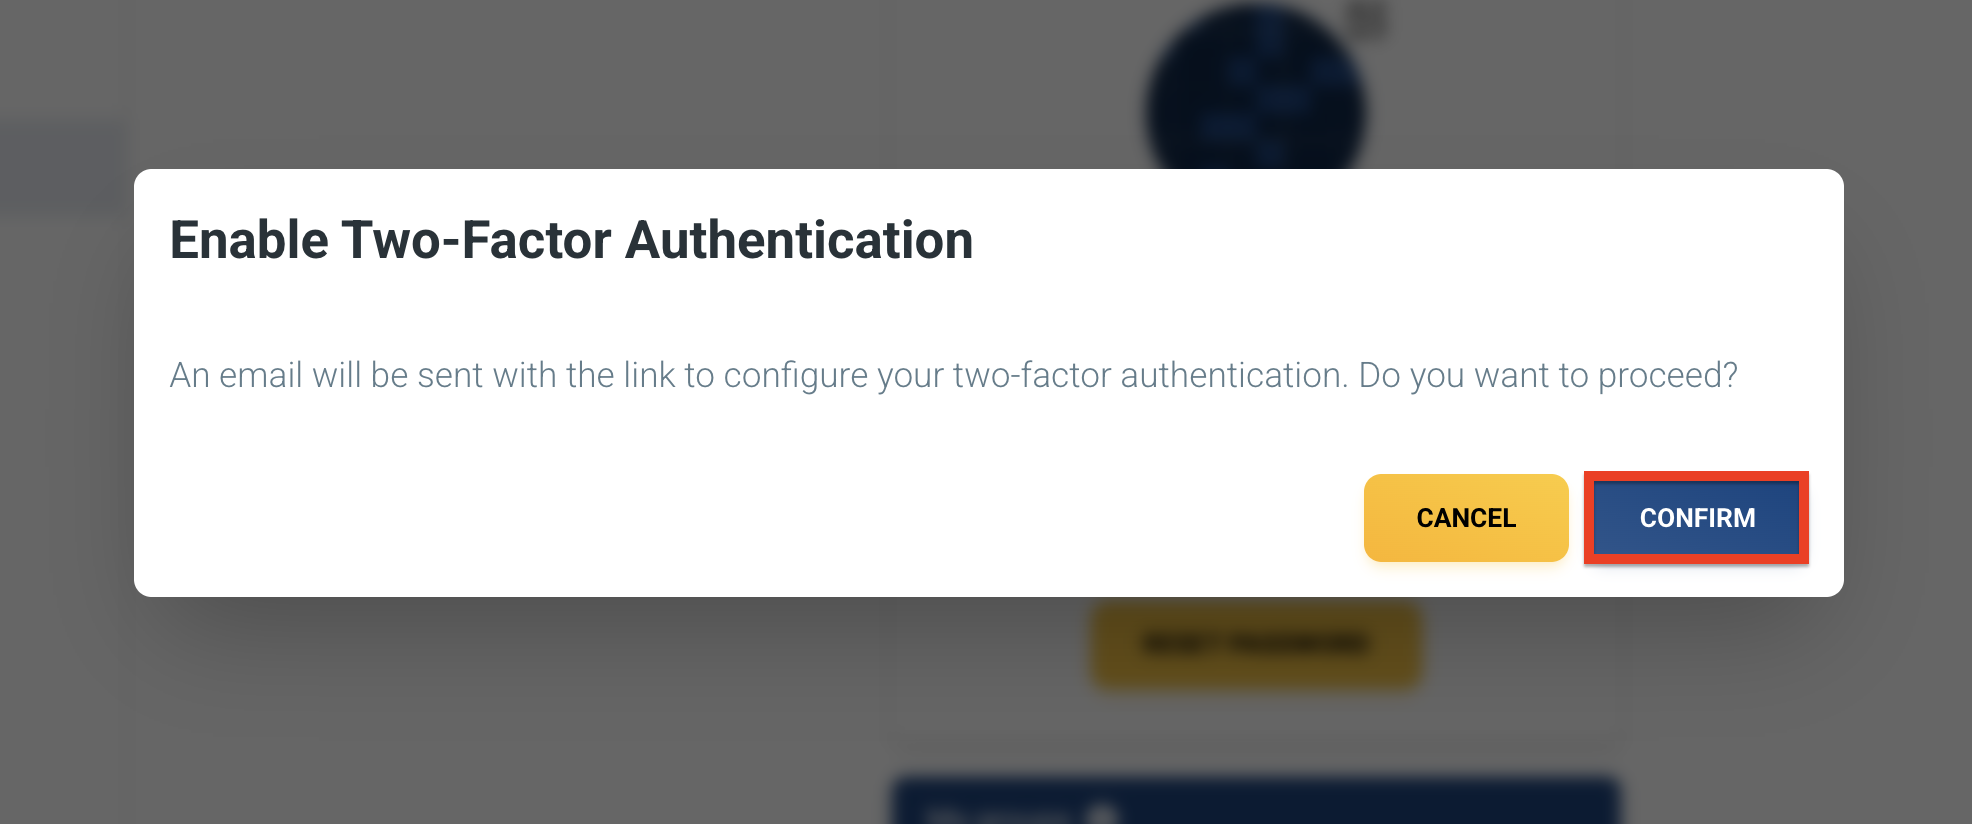
Figure 8. Pop-up confirmation for enabling Two-Factor Authentication. -
After confirming, you’ll receive an email with a setup link.
Open your inbox and click the link to continue.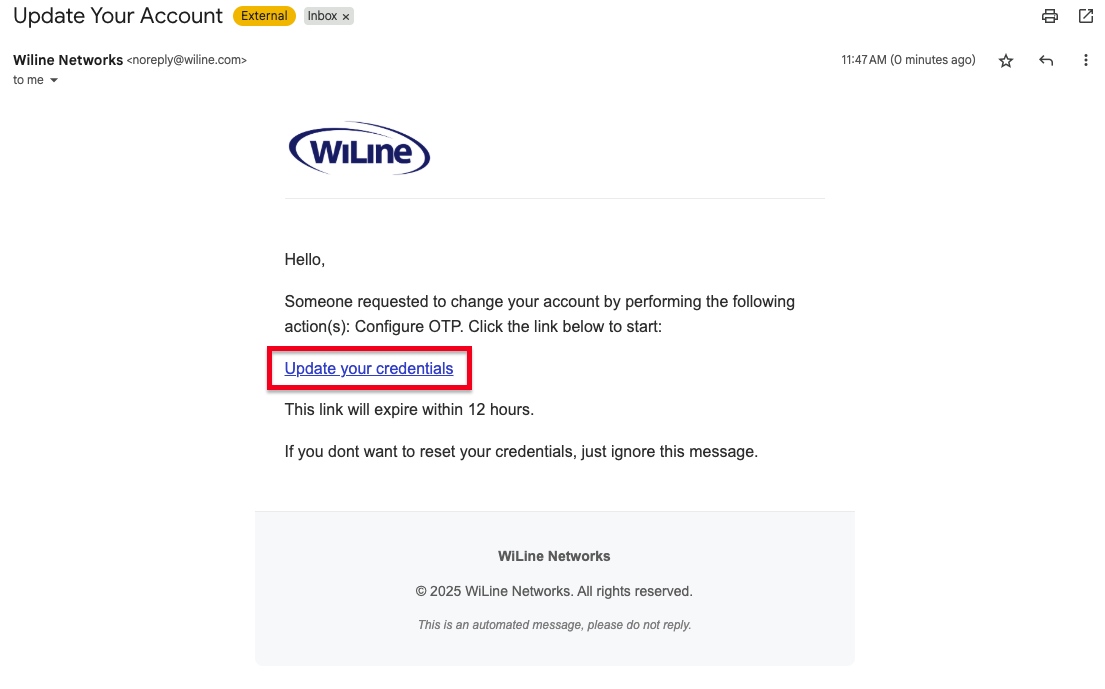
Figure 9. Email received to enable Two-Factor Authentication. -
The link redirects you to the 2FA setup page. Click Continue to proceed.
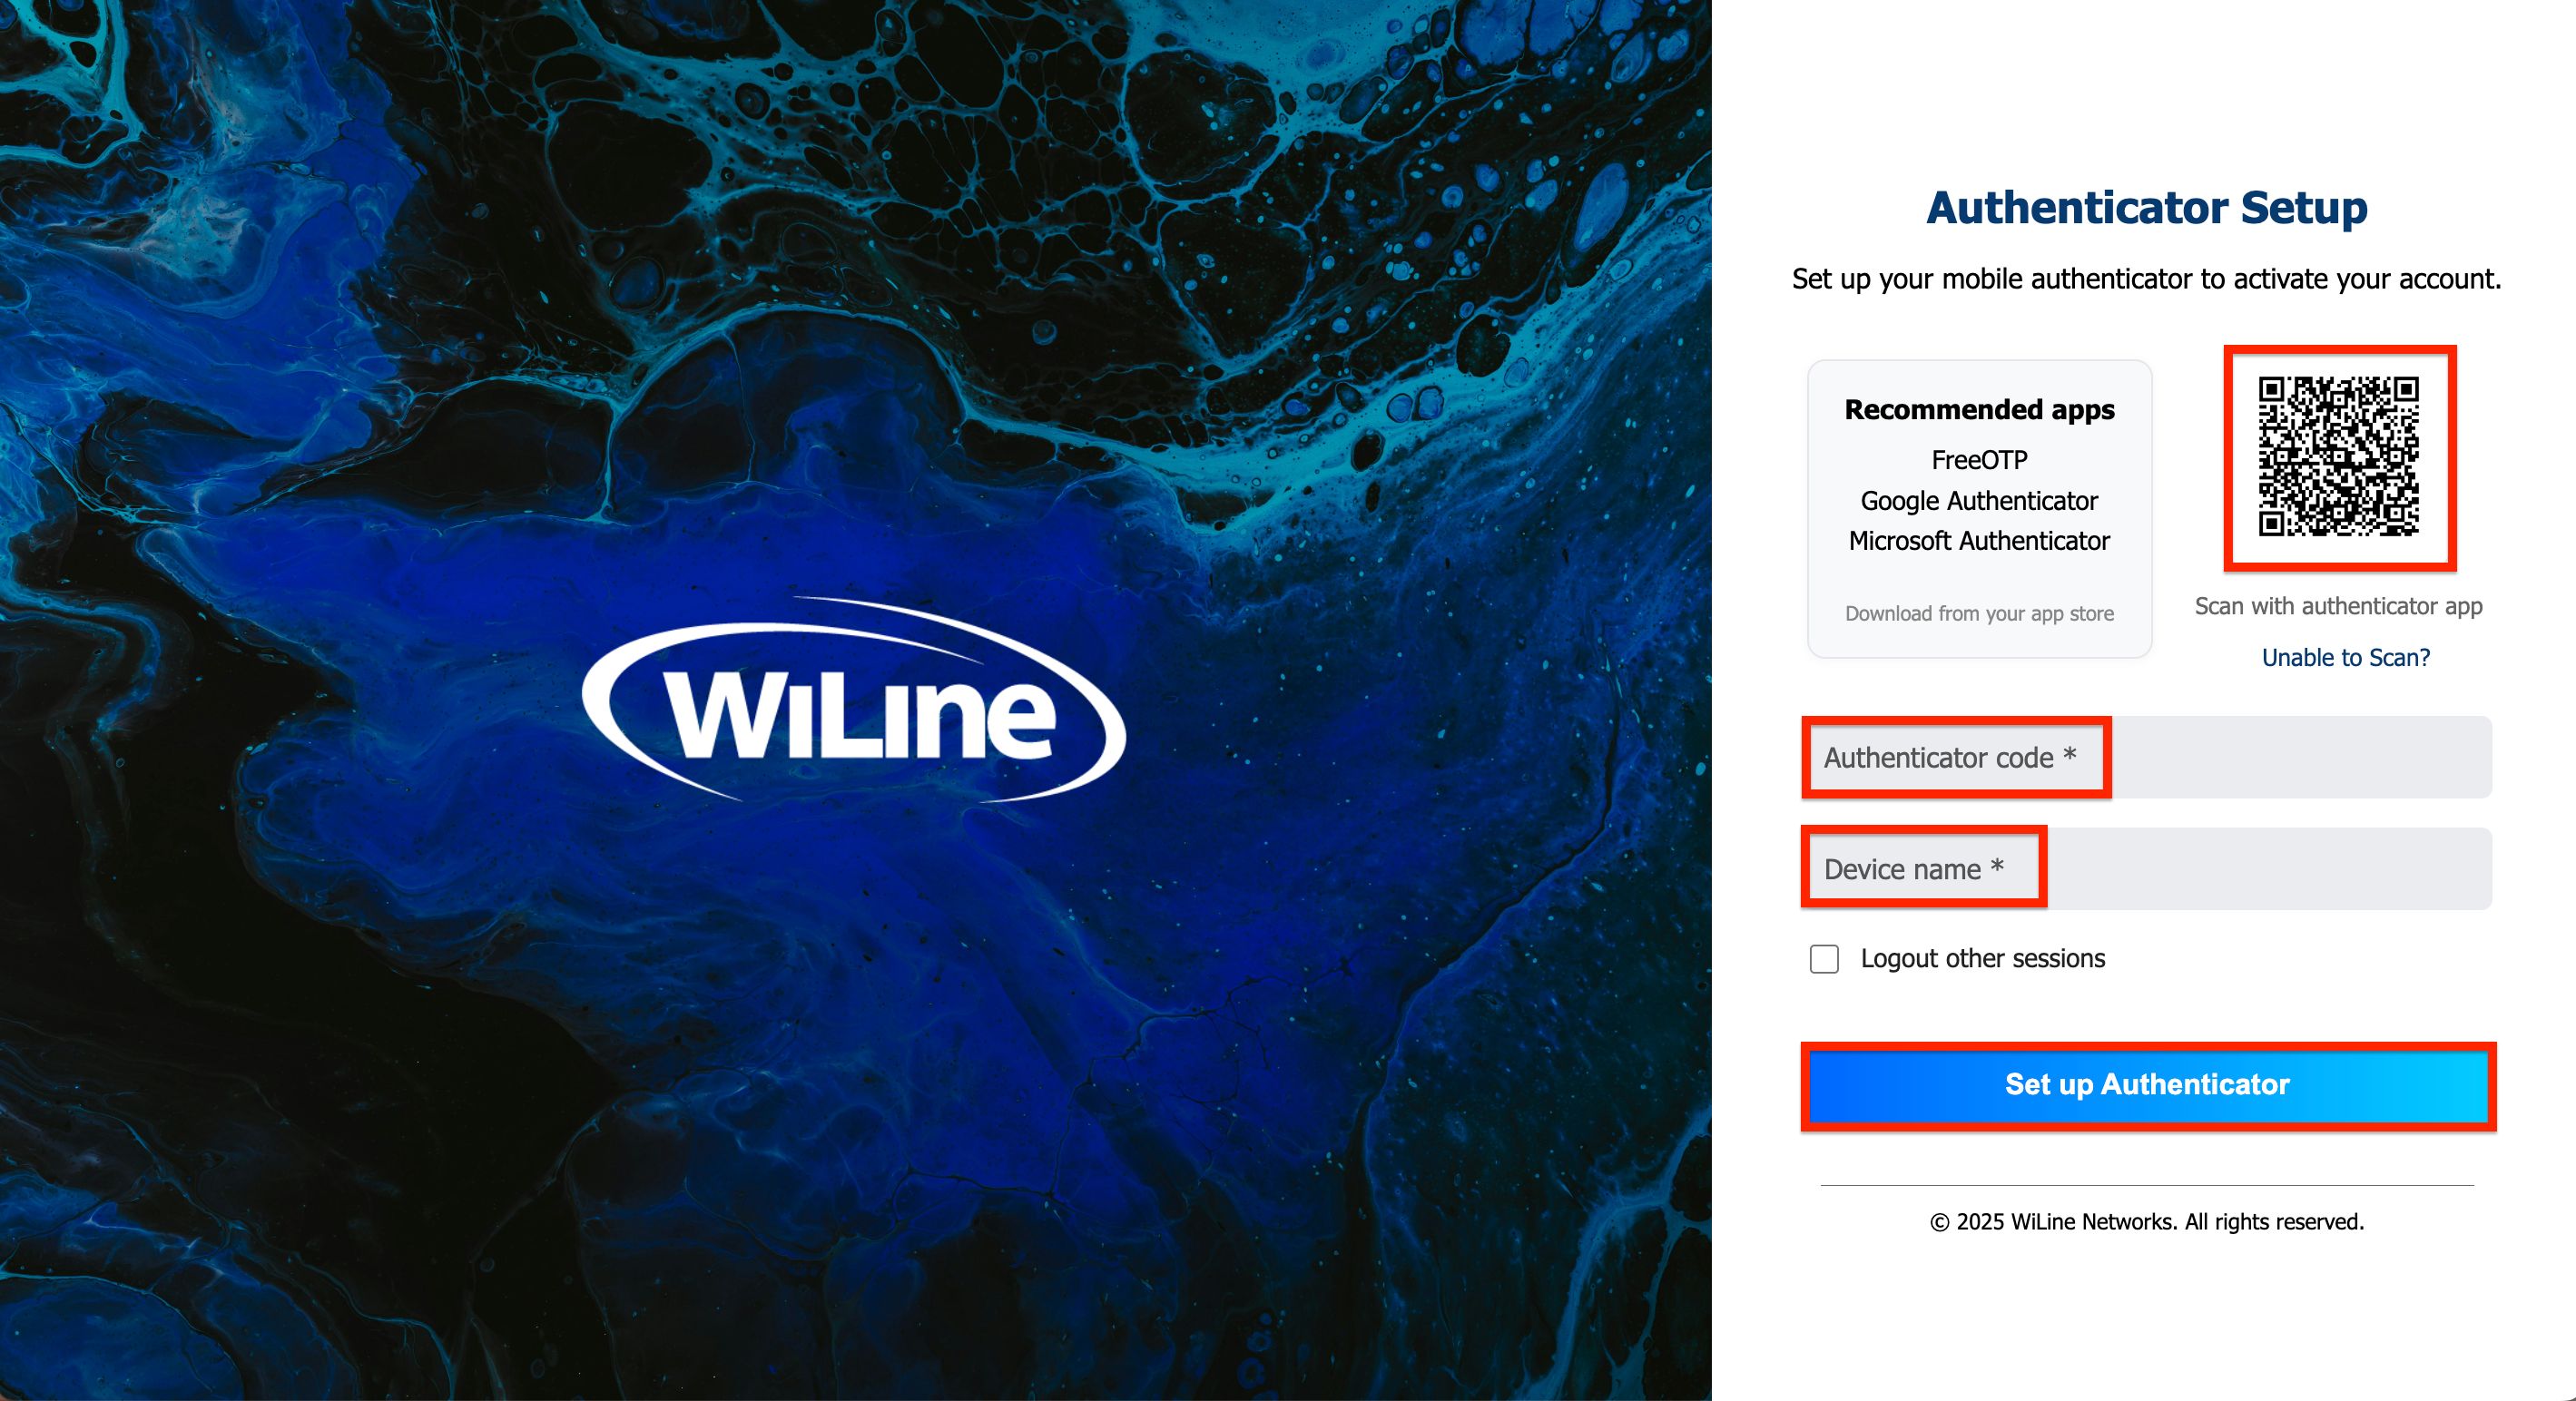
Figure 10. Authenticator Setup. -
Choose an Authenticator App (such as Google Authenticator or Microsoft Authenticator).
Download one from your device’s app store if you don’t already have one. -
On the setup page, scan the QR code displayed using your authenticator app.
- If you’re unable to scan, click Unable to Scan? to view the setup key and manually enter it into your app.
-
Once your app generates a verification code, enter:
- The code from the app
- A device name of your choice
Then click Set Up Authenticator to finish the configuration.
noteTo disable 2FA, follow the same procedure; the DISABLE 2FA button will replace the Enable under the Accoutn Settings section.
-
-
Reset Password: Click RESET PASSWORD. A confirmation pop-up appears asking if you want to proceed. Upon confirmation, an email with a reset link will be sent.
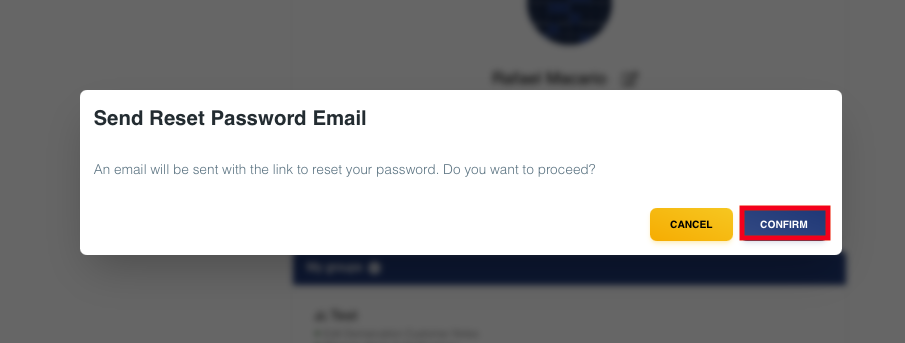
Figure 10. Pop-up confirmation for resetting your password.
Buttons in pop-ups use primary styles for CONFIRM and secondary styles for CANCEL.
-
-
Help: Opens a panel with common questions and topics to assist in navigating and using the SD-WAN Portal effectively, including direct access to the full Help Guide.
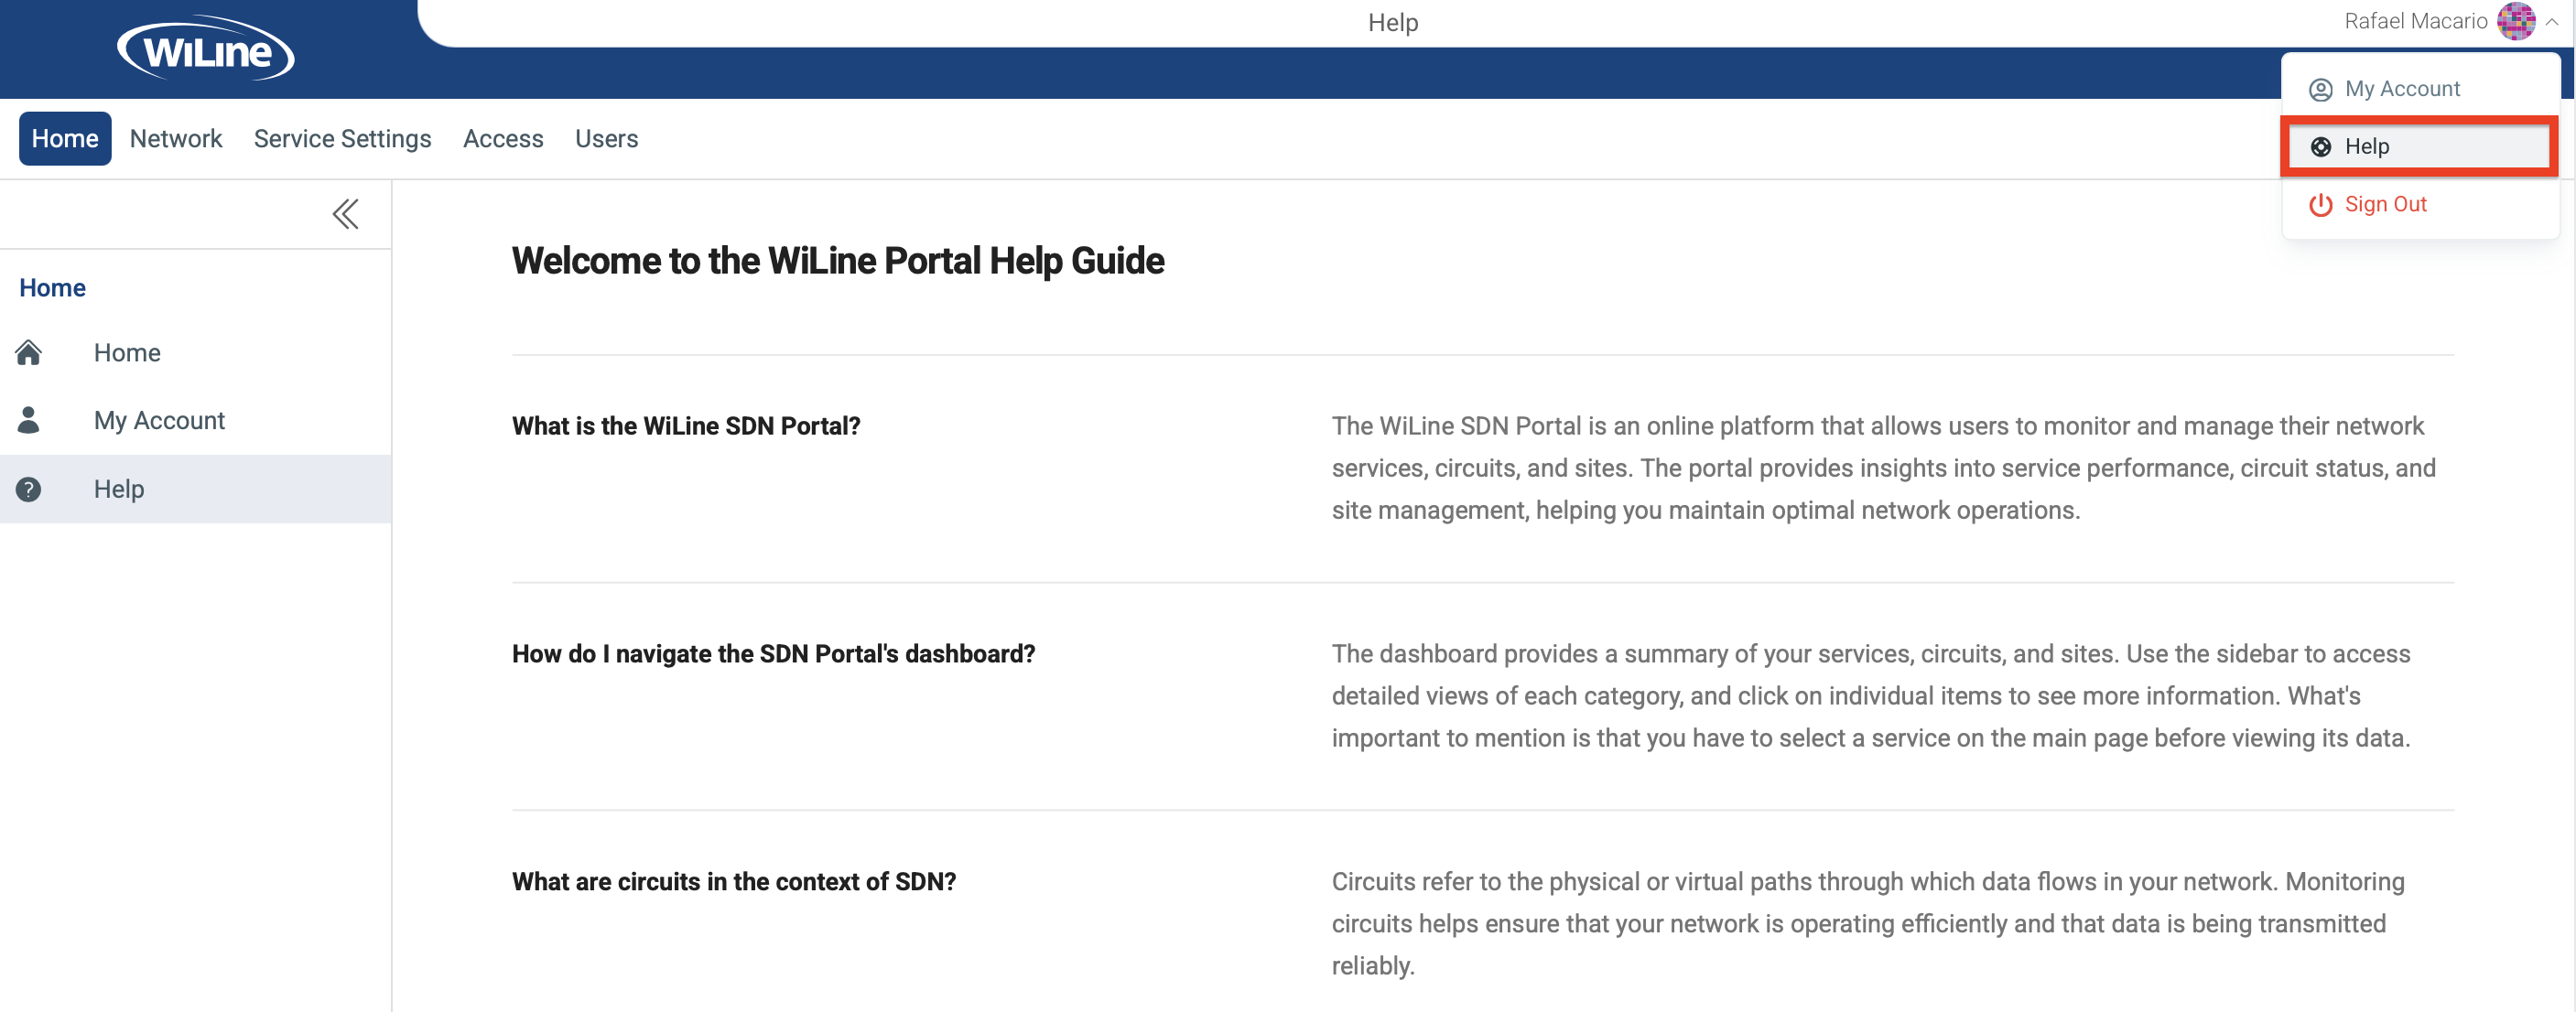
Figure 11. Accessing the Help panel with common questions and topics. -
Sign Out: Log out of your account.
The SD-WAN Portal is designed for easy navigation, ensuring you can efficiently manage your services and configurations. Explore the features available to maximize your experience!